Toyota Key Skin
This guide walks you through installing the Arcane Layers Toyota Key Skin onto your Toyota key fob.
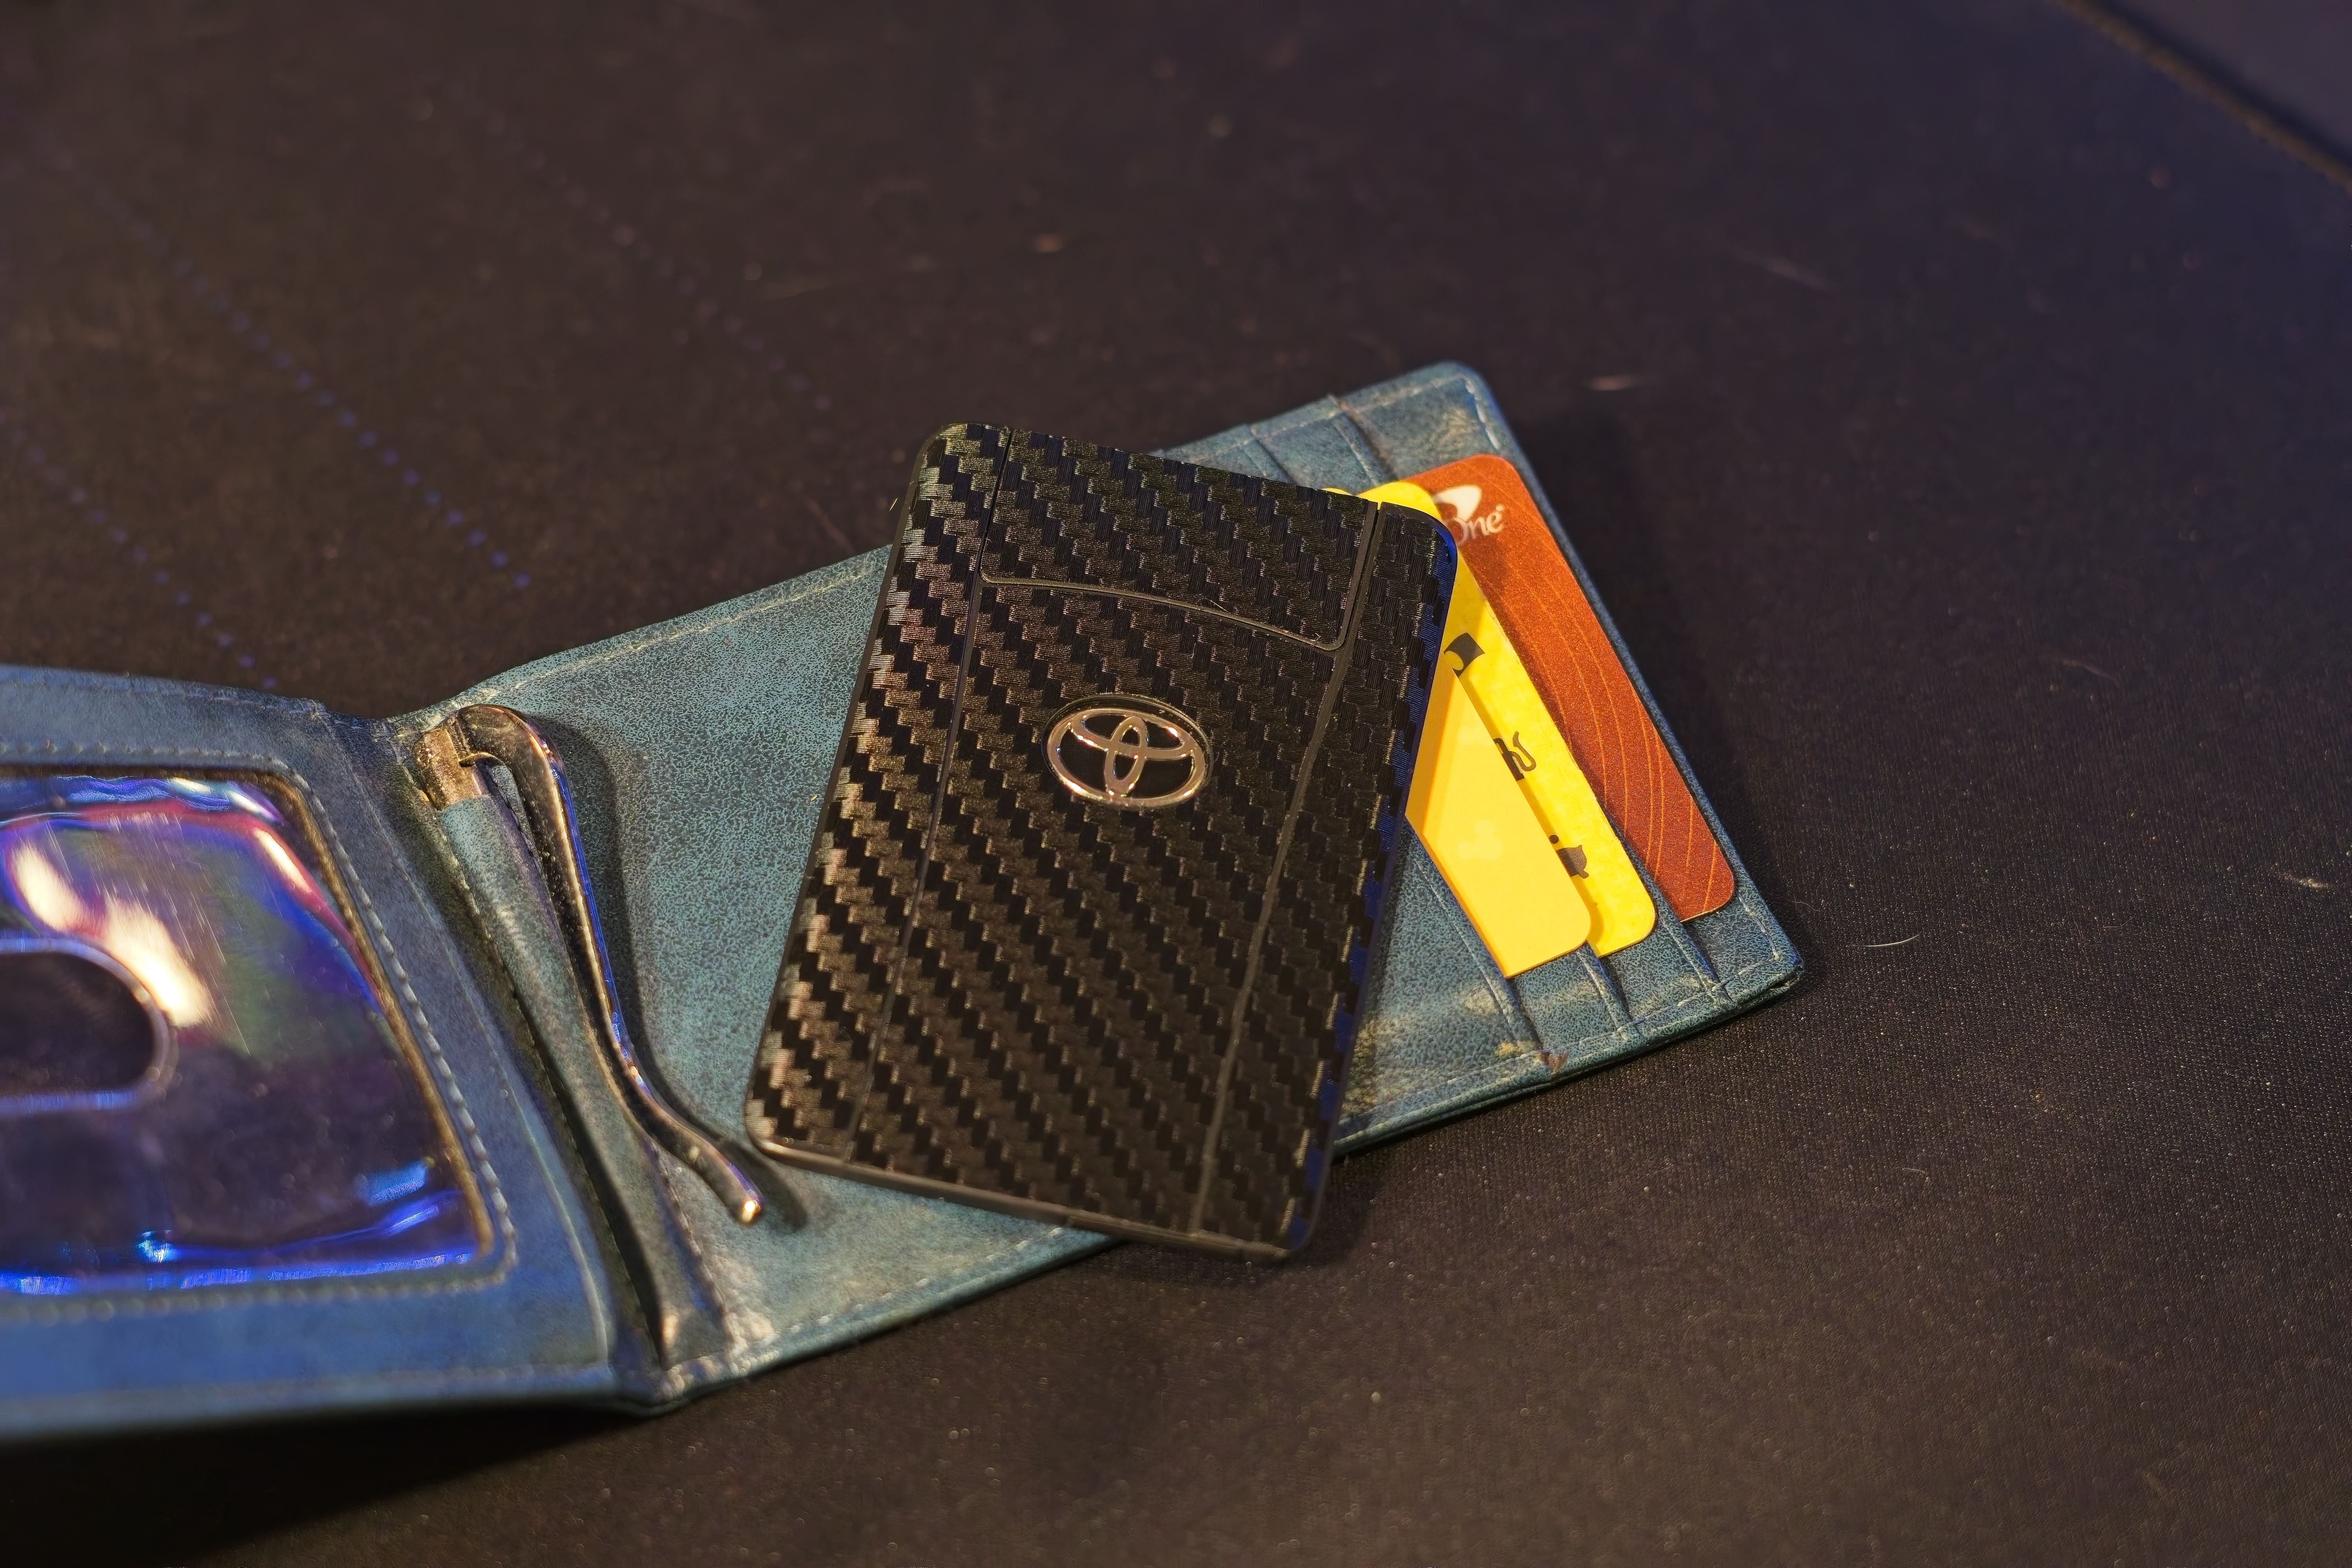
Installation Guide
-
Gather your supplies: isopropyl alcohol (or another suitable cleaner), a paper towel, the skin, your key fob, and optionally a spray bottle of water to help with alignment.
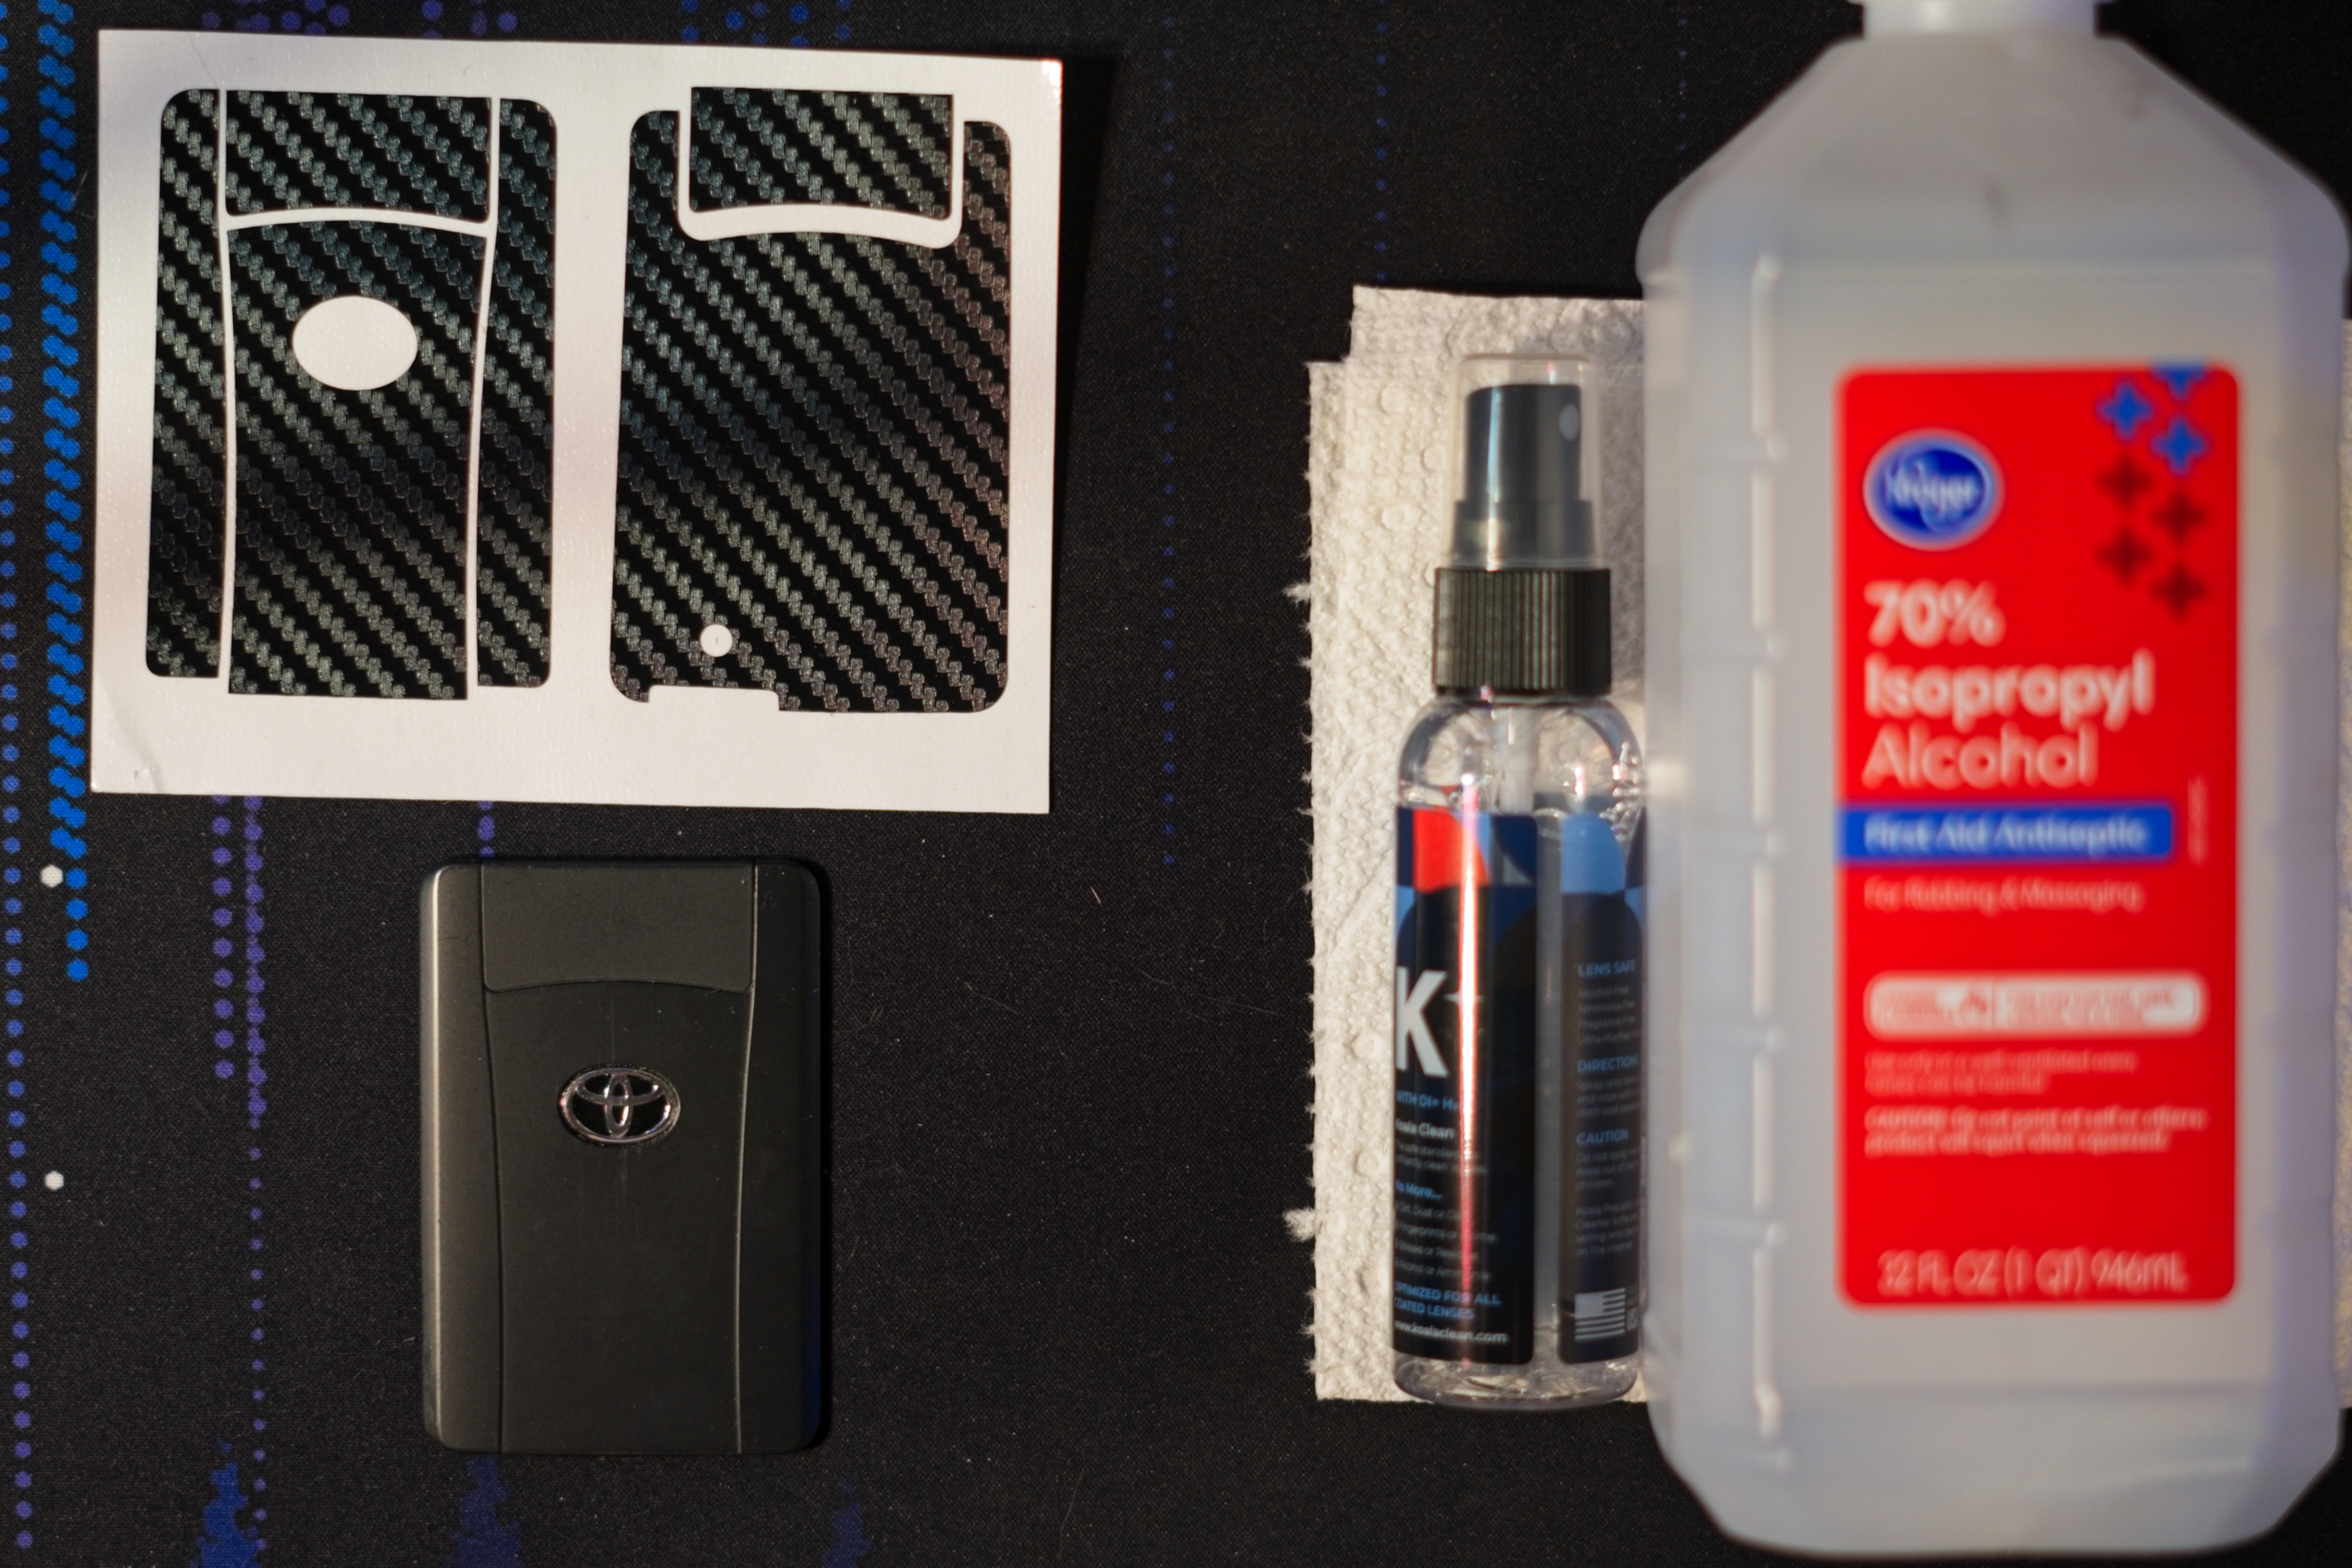
-
Clean the key fob thoroughly with a paper towel and isopropyl alcohol to remove any oil or debris that could prevent proper adhesion.
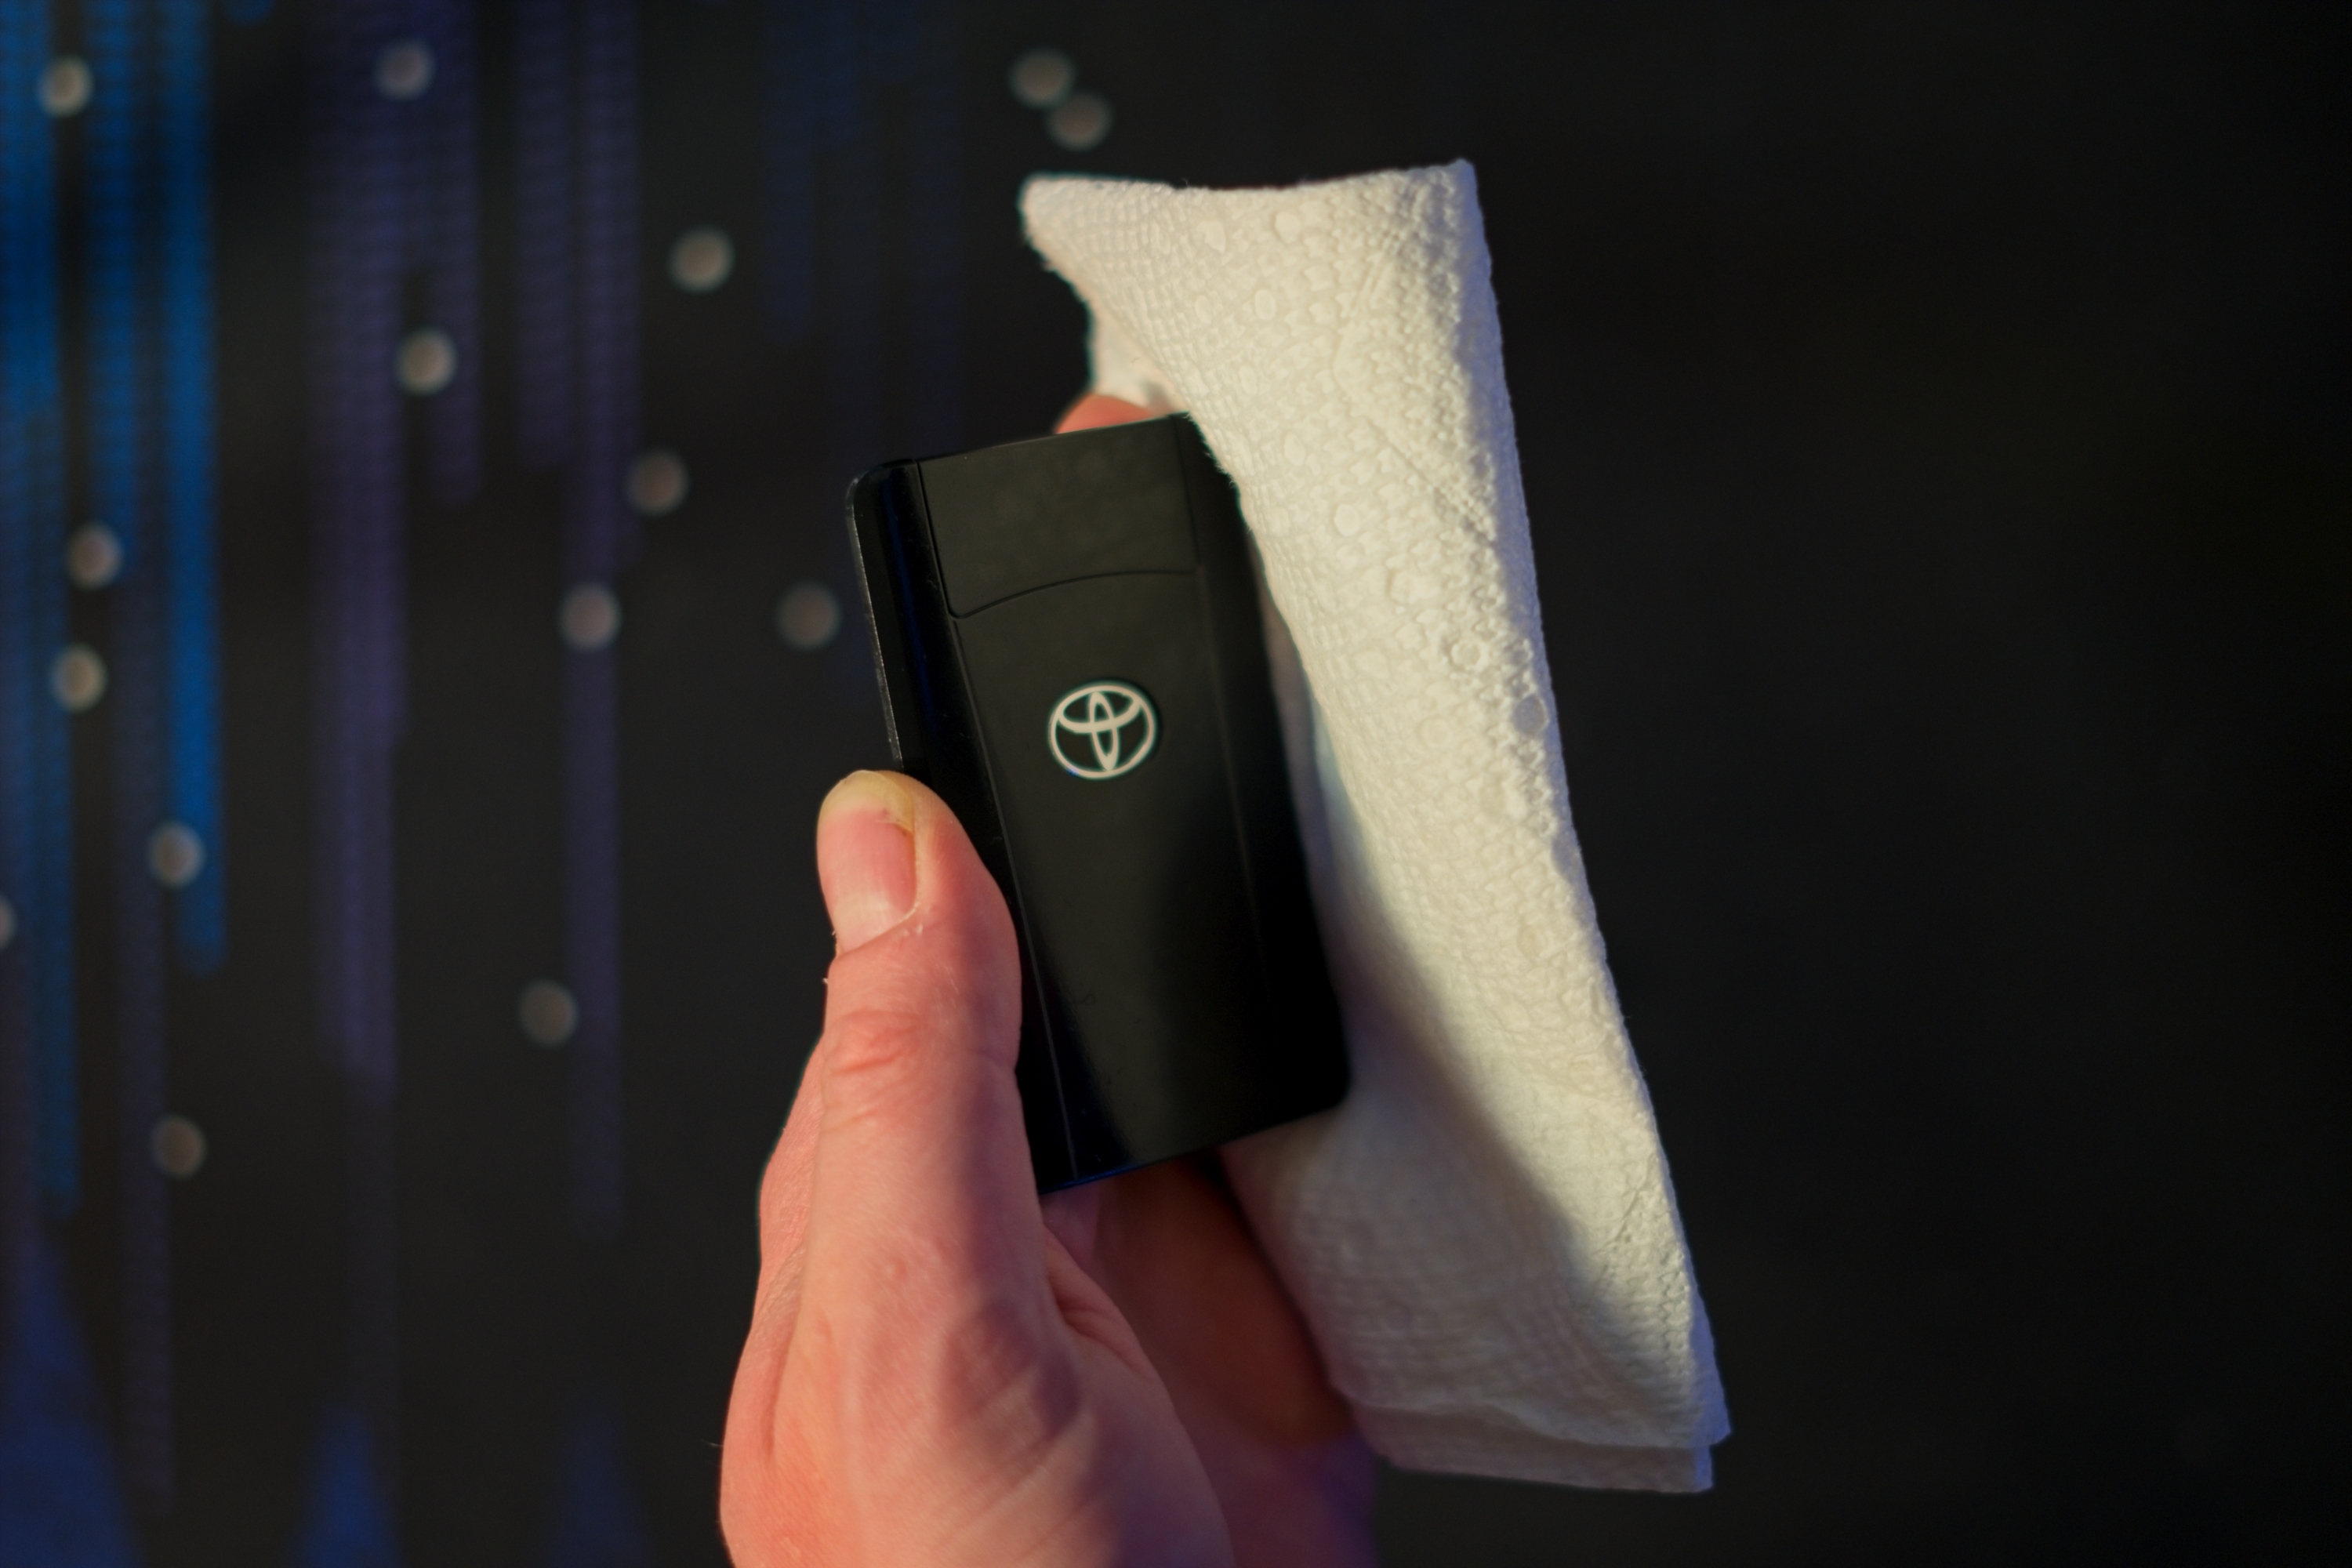
-
Optionally, lightly mist the key fob with water. This allows you to reposition the skin before it fully adheres.
warningThis key fob is not waterproof! Use only a light mist — do not soak it.
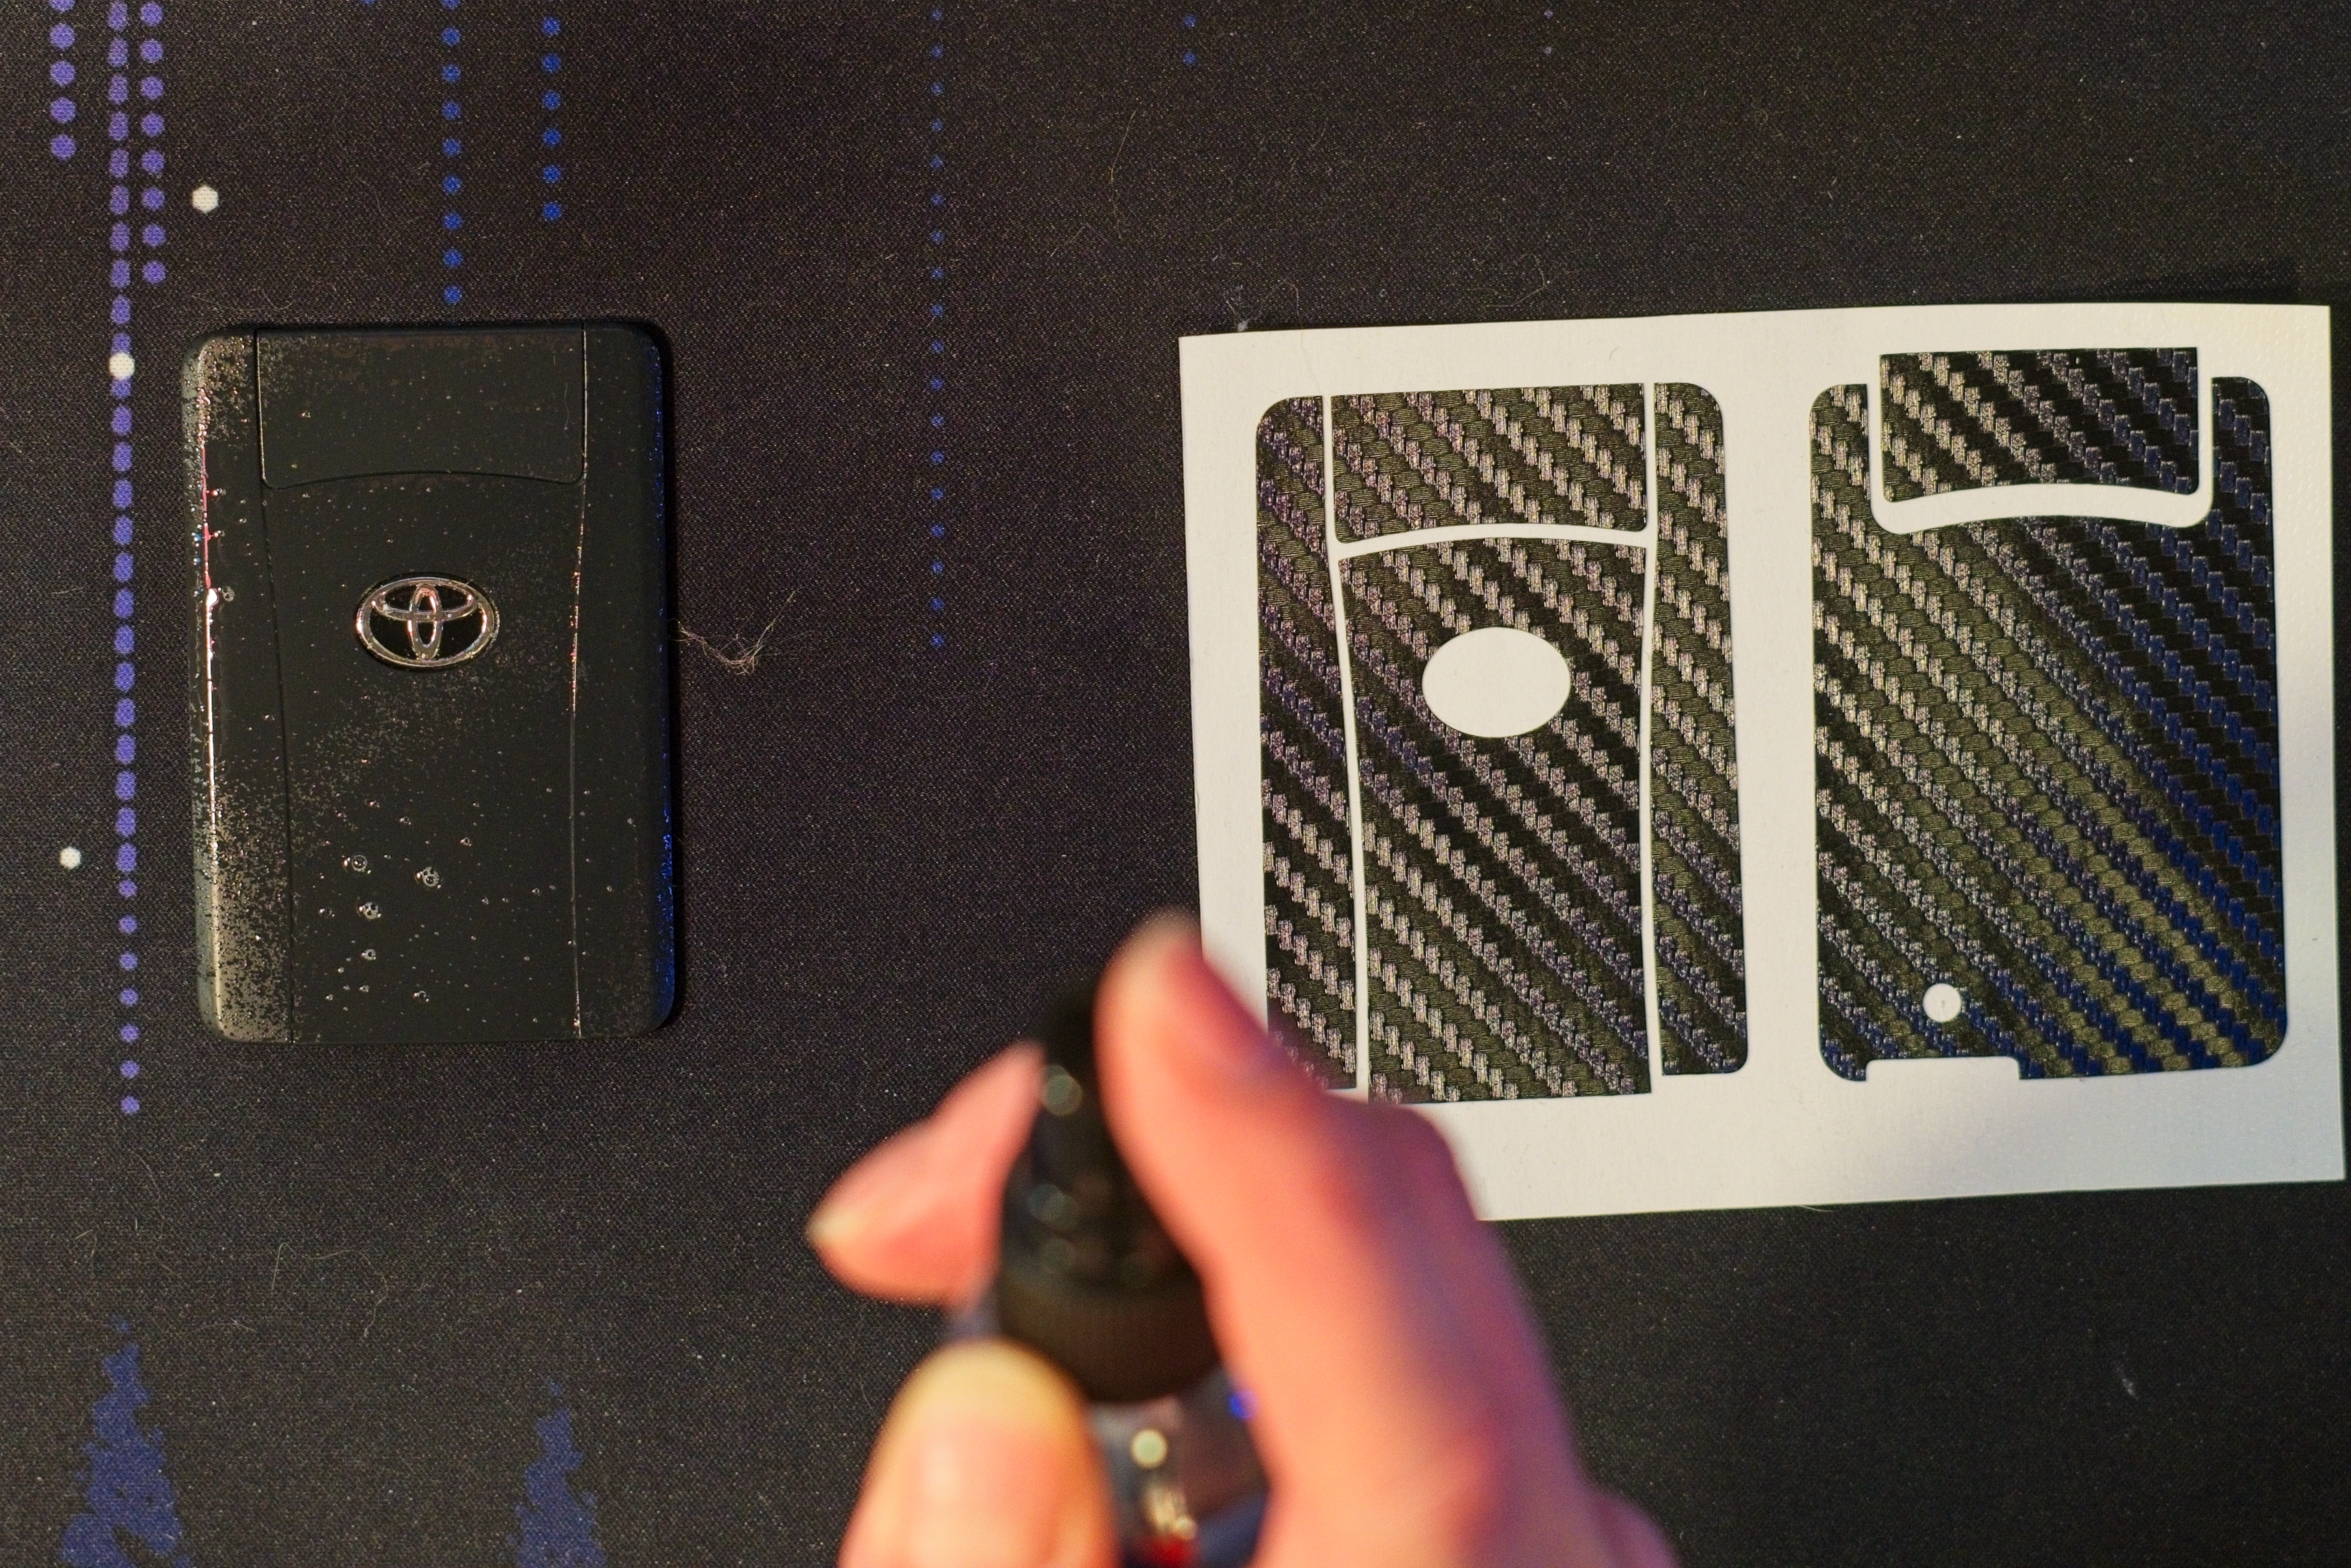
-
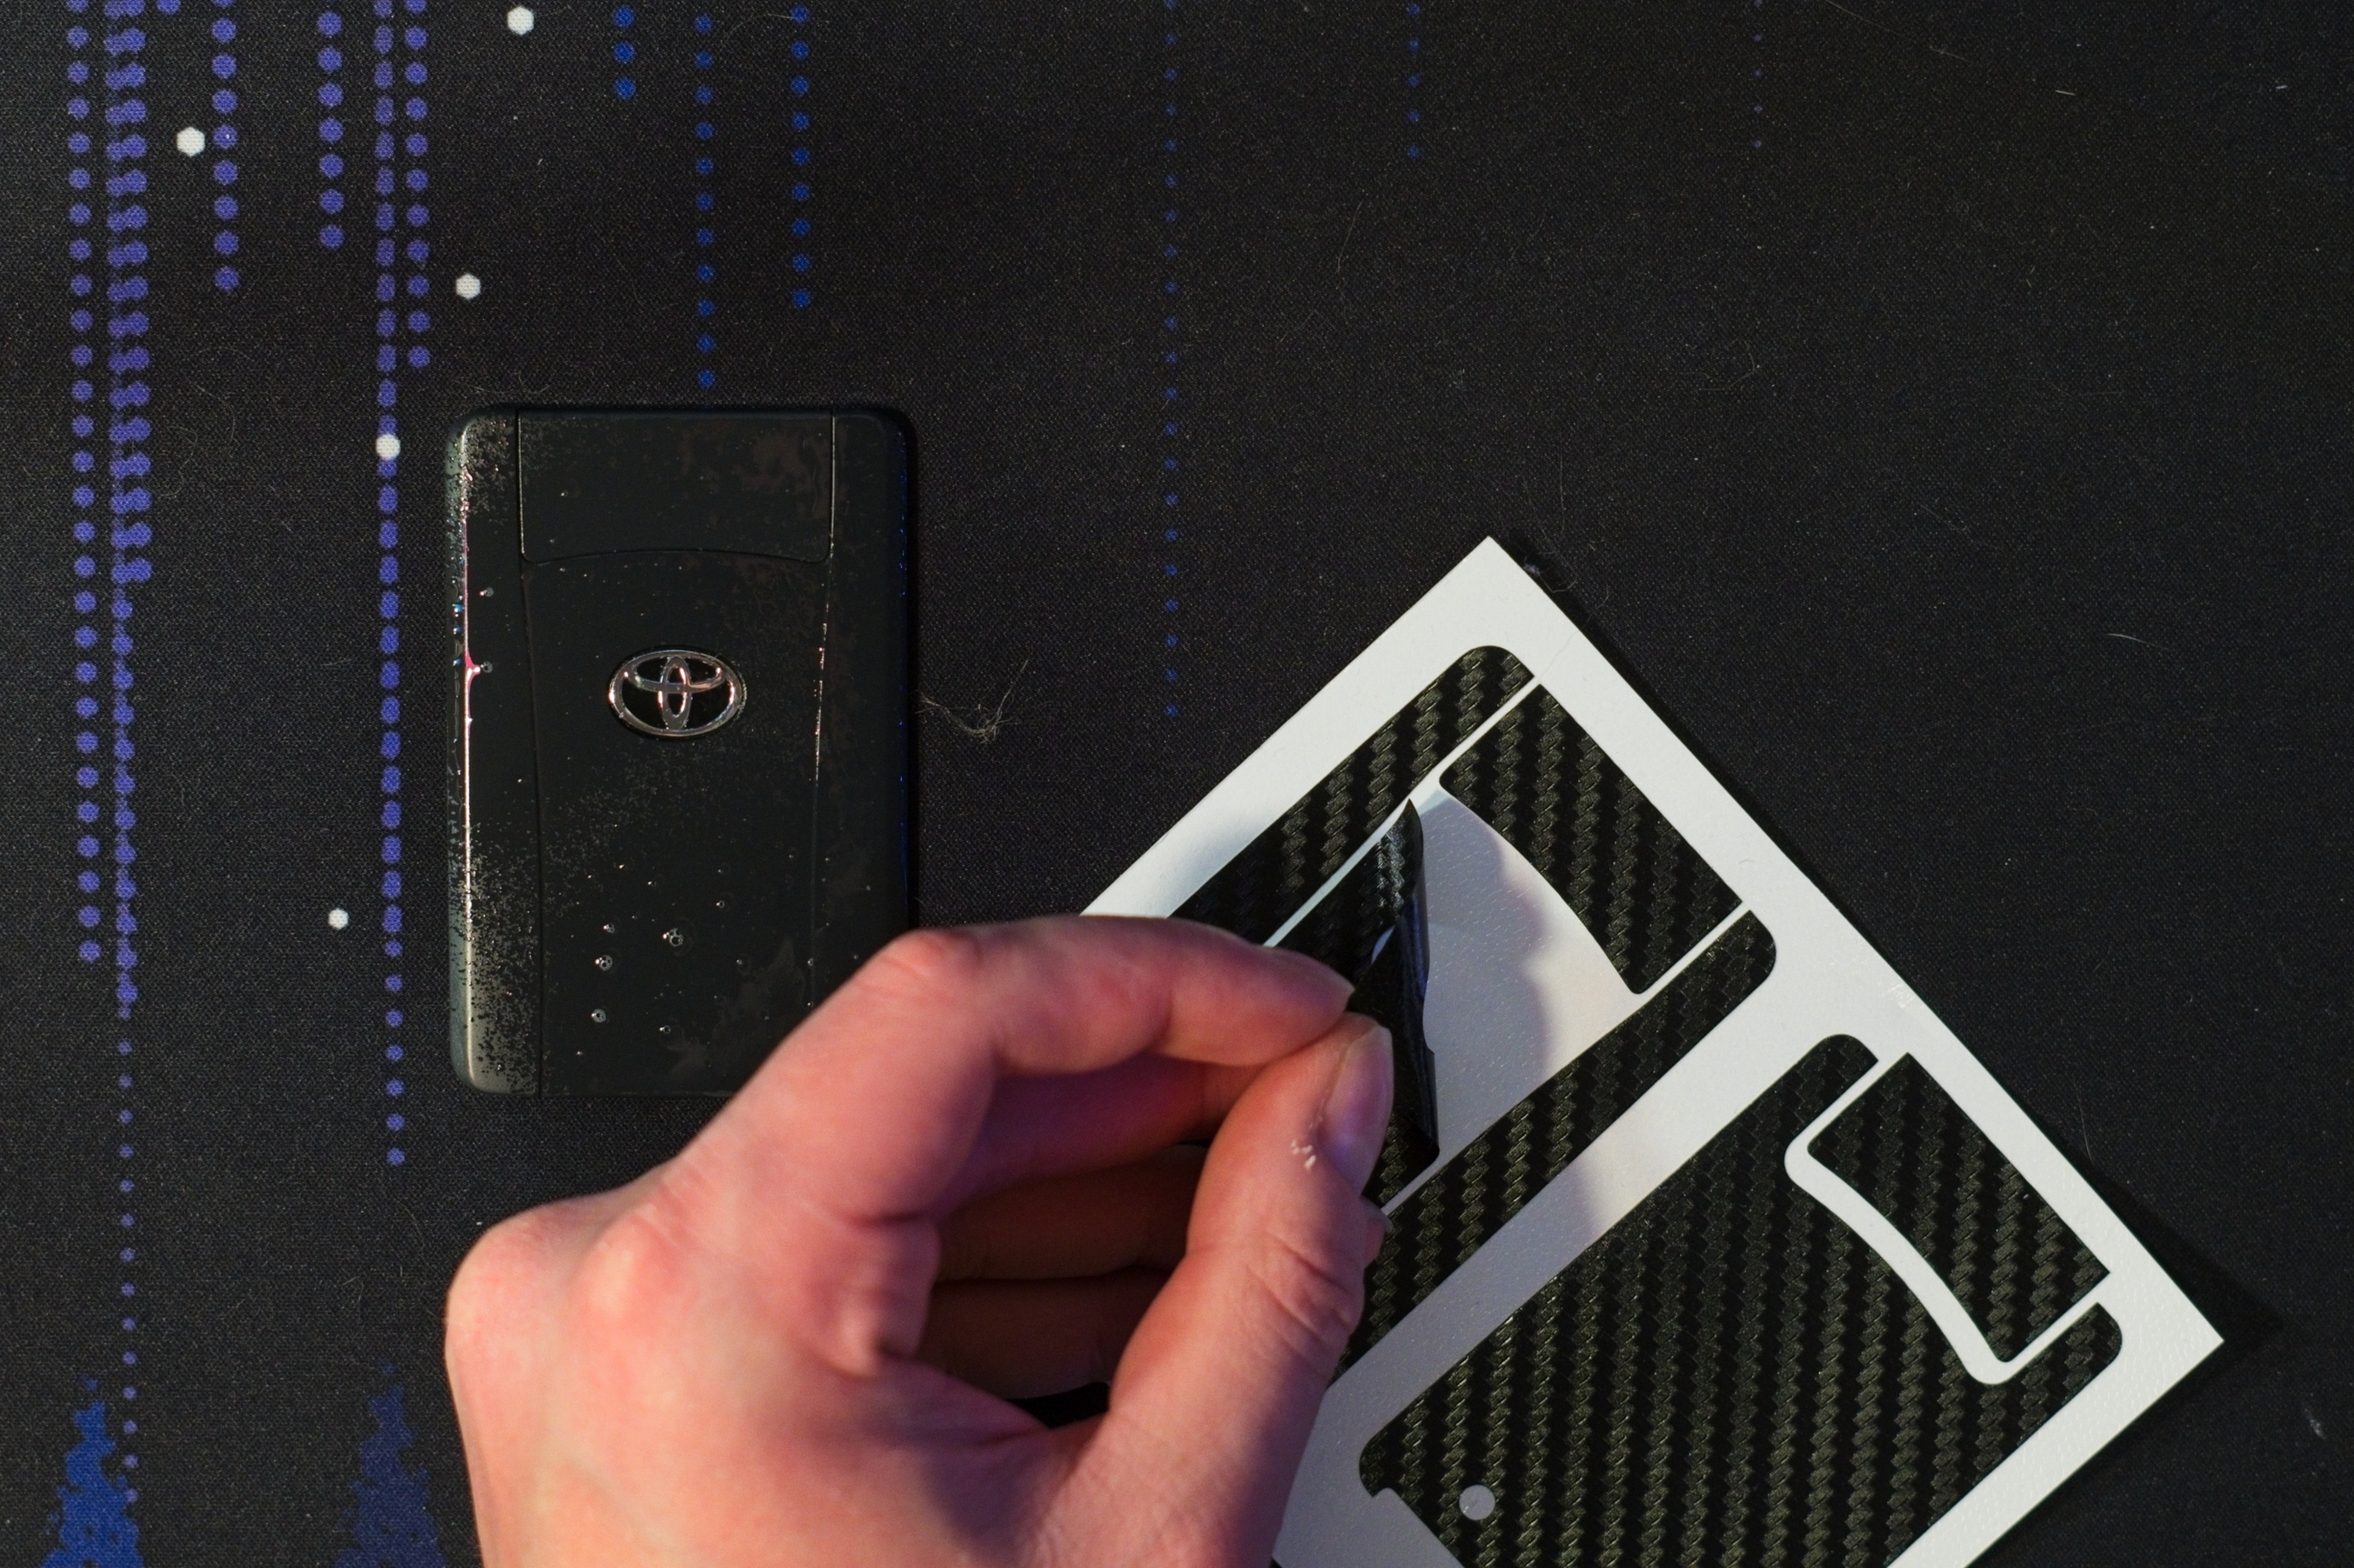
Peel the middle panel of the skin from the backing.
-
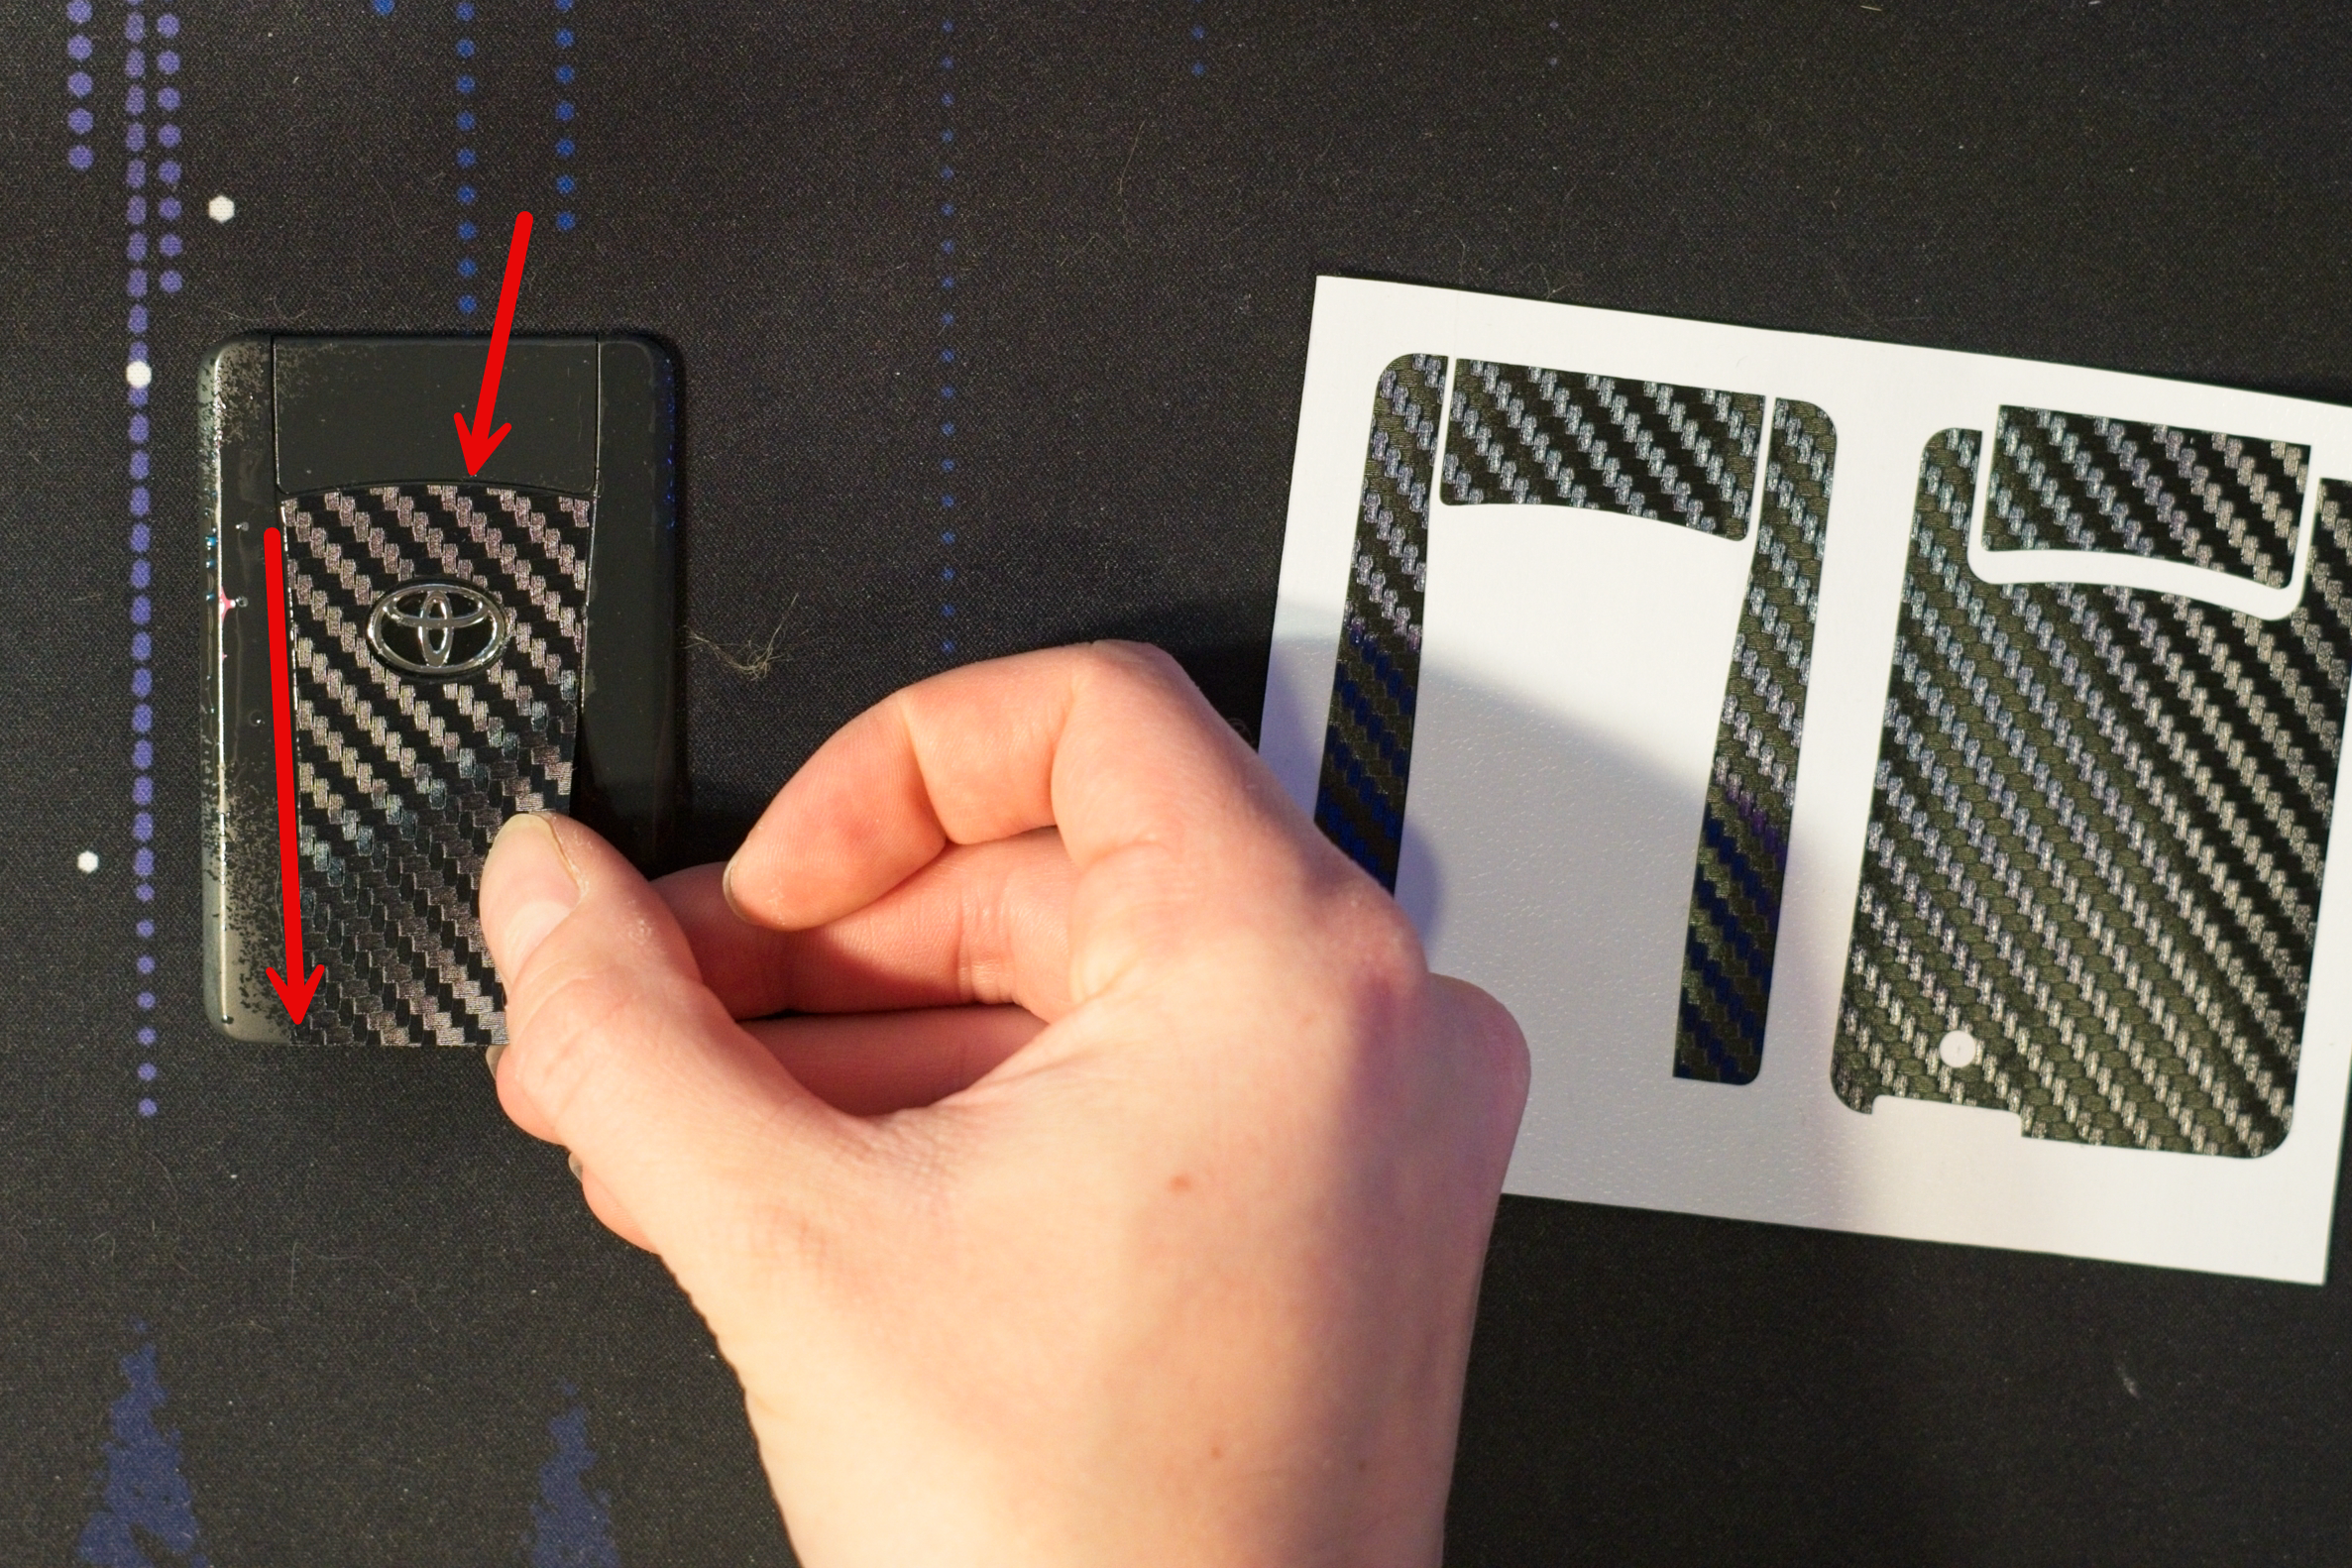
Align the top edge of the middle panel with the matching area on the key fob, then slowly lay it down, keeping the left edge aligned with its corresponding edge.
 tip
tipIf you used water, you can gently shift the panel to fine-tune the fit before pressing it down.
-
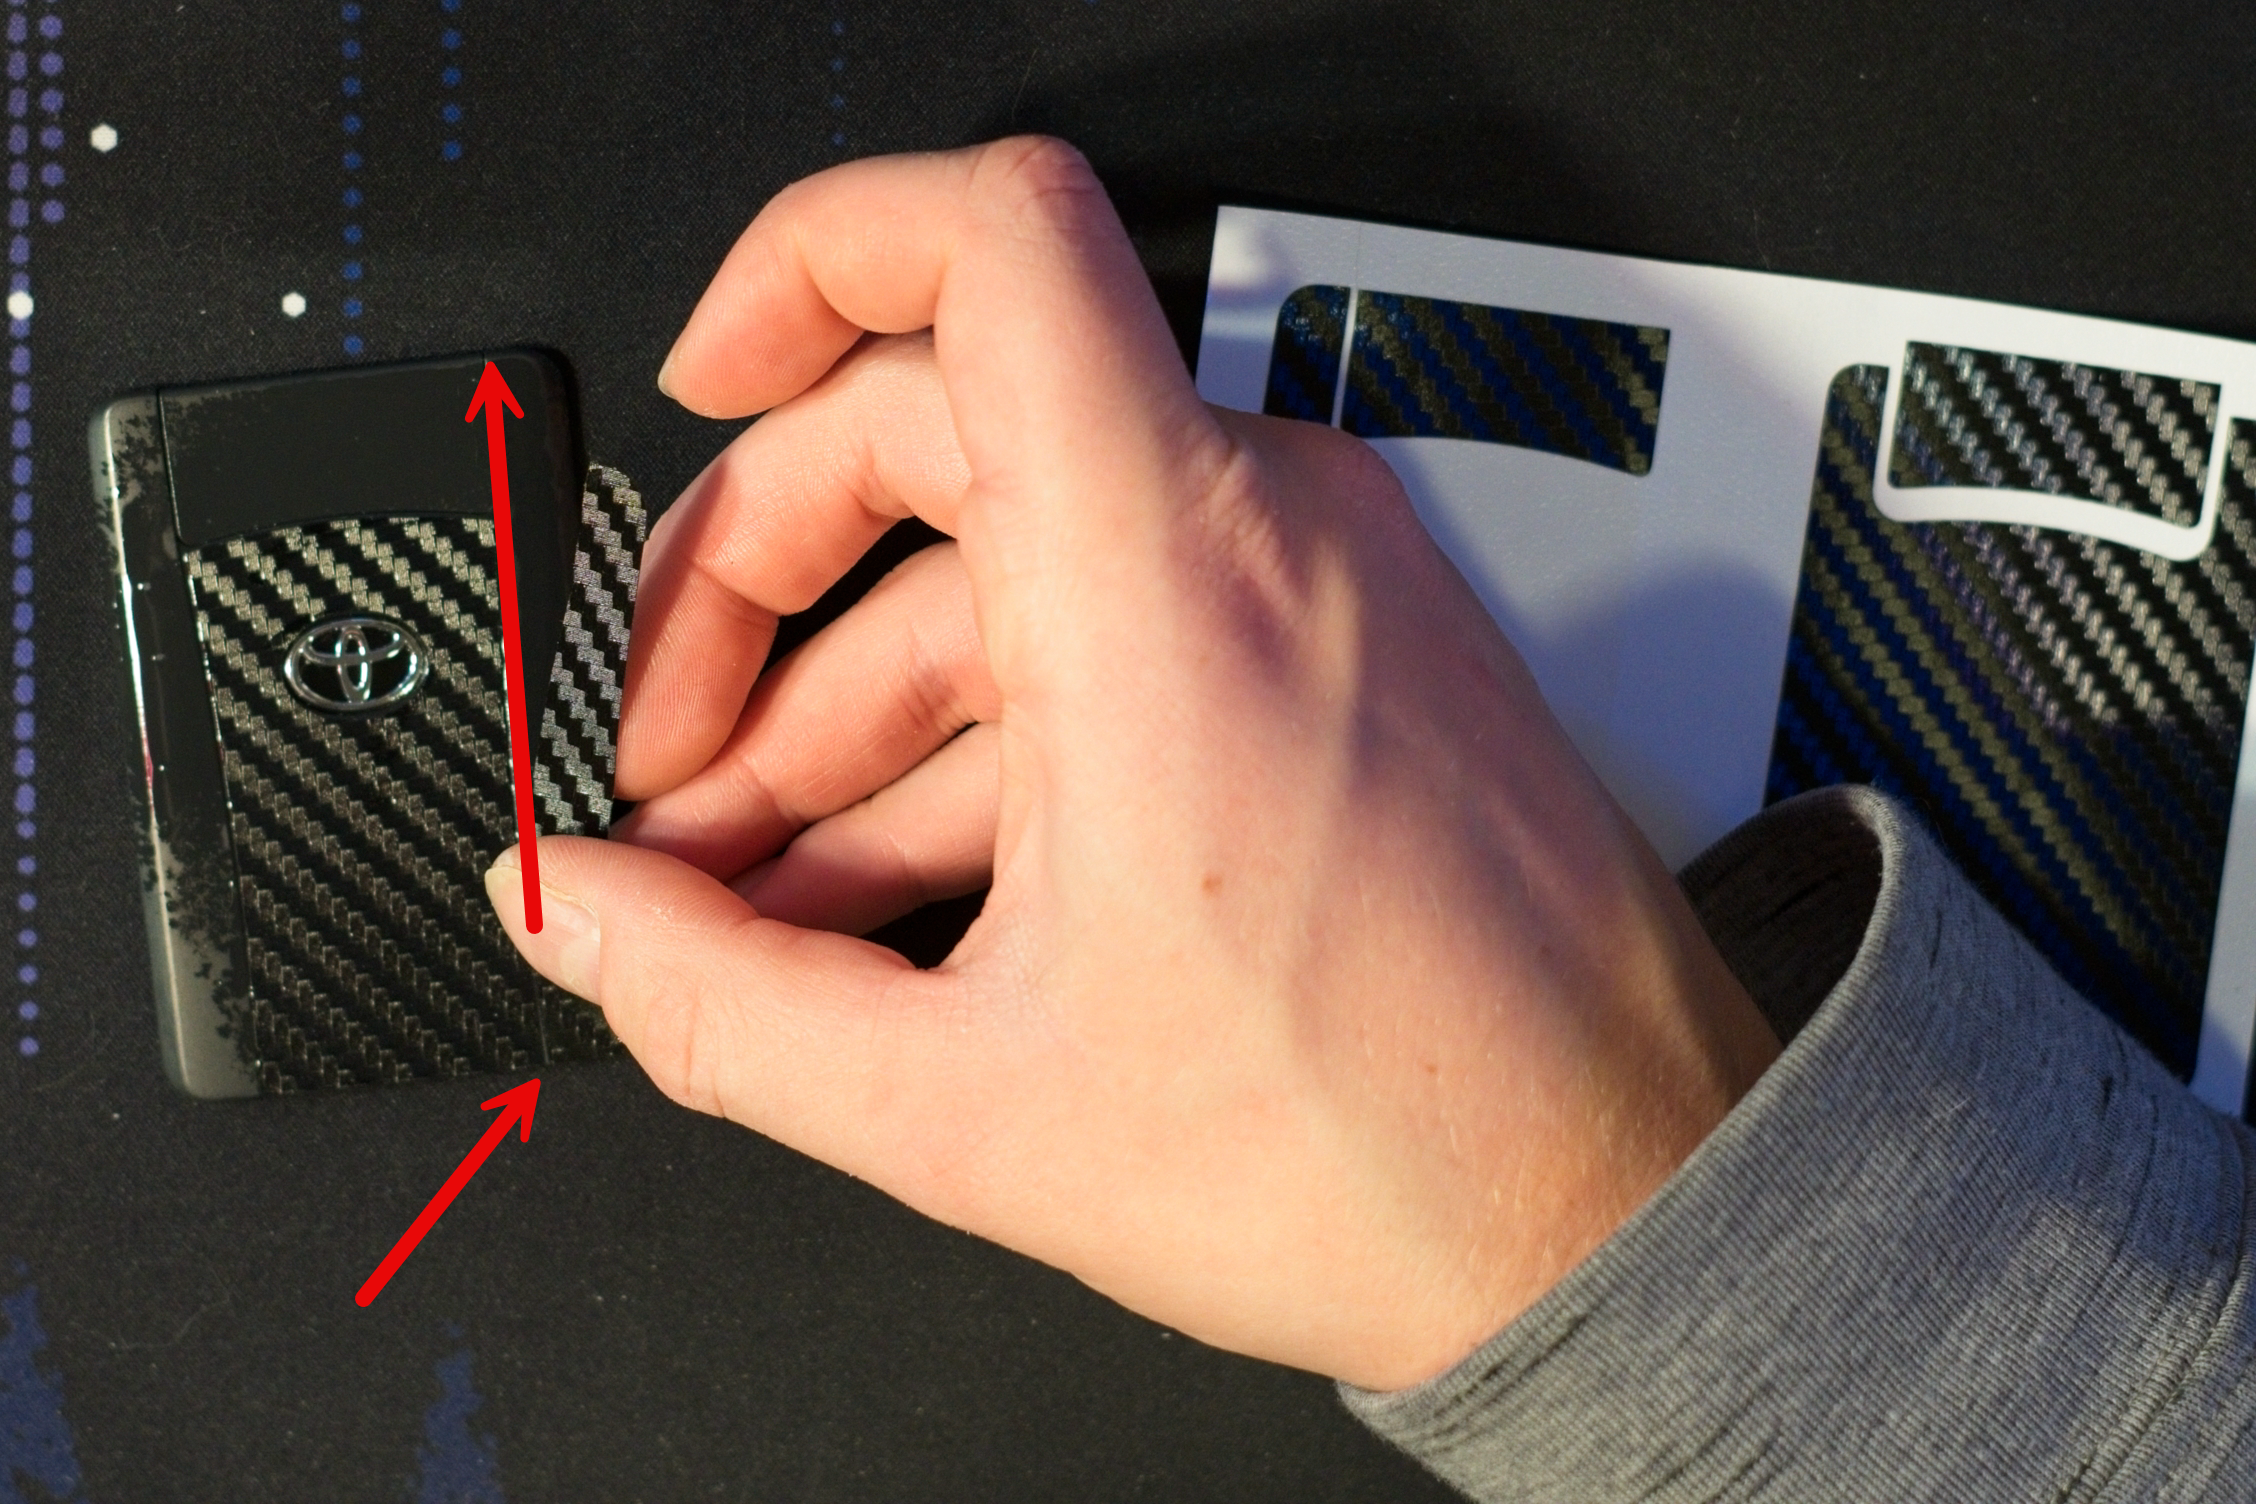
Peel the right panel from the backing. Align it starting at the bottom-left corner, then slowly lay it upward along the contour of the key.
 tip
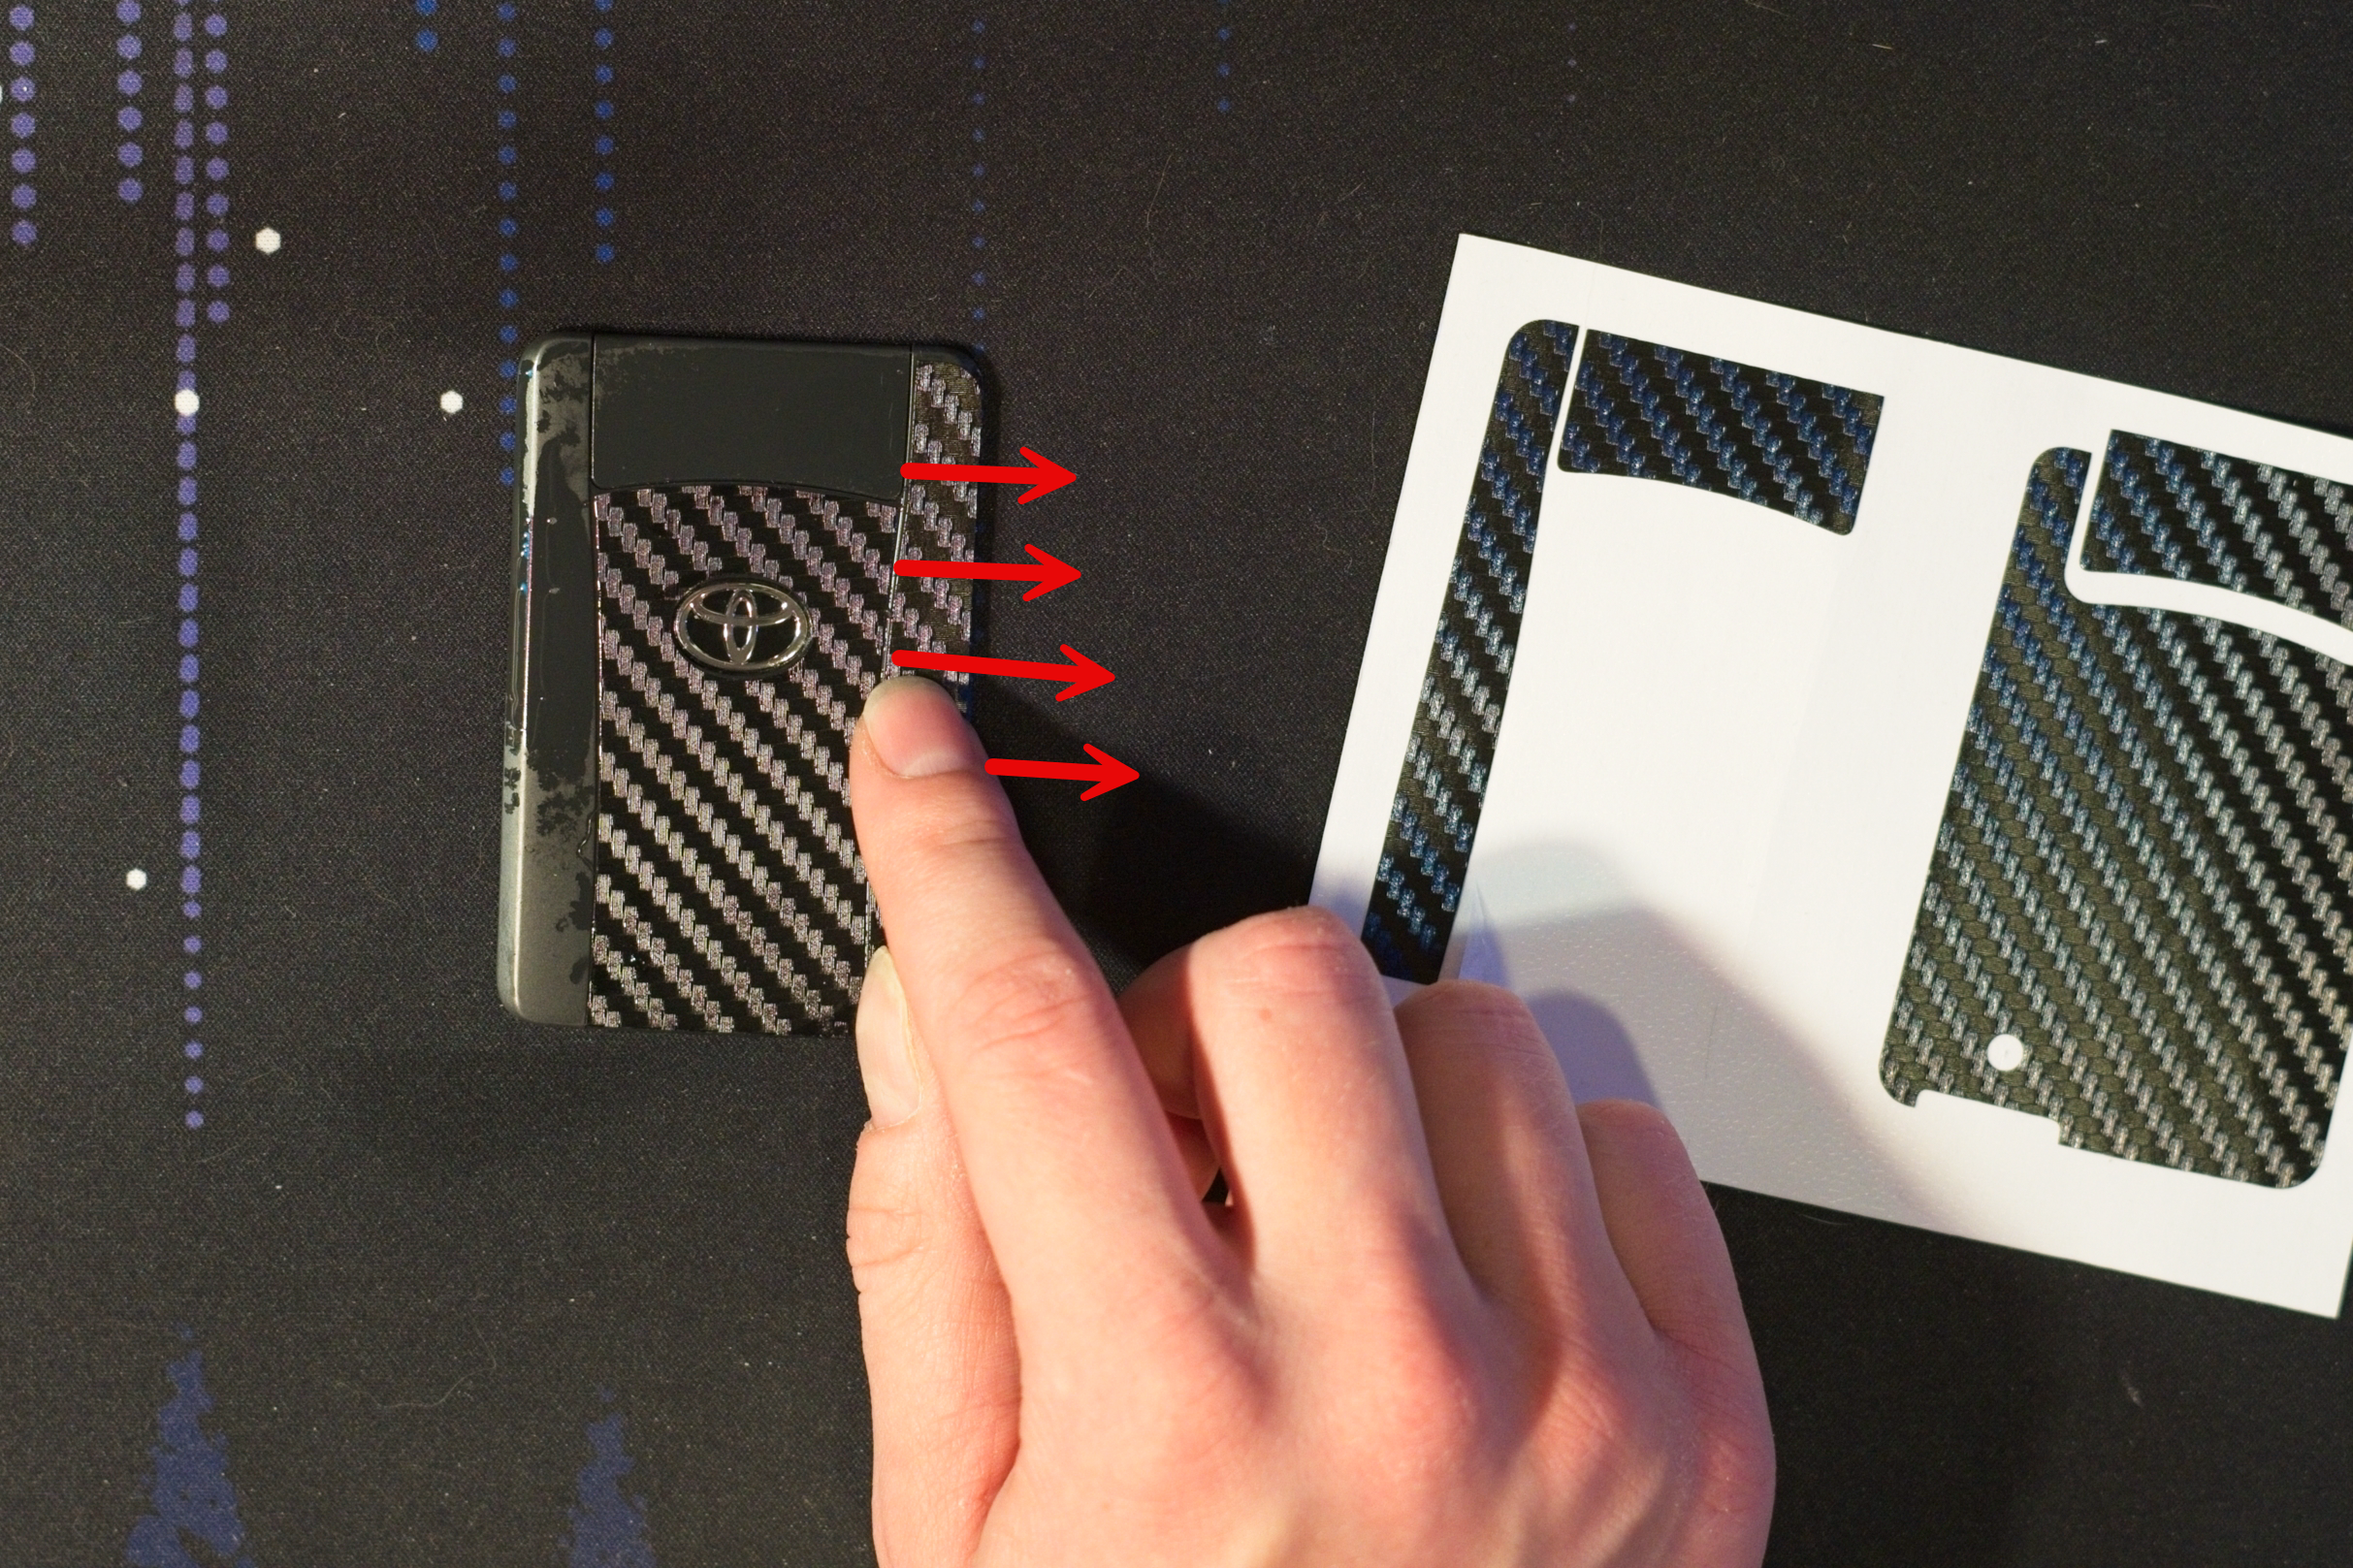
tipIf you used water, use your fingers to squeeze out any moisture. Make a gentle first pass, then a second pass with more pressure.
-
Apply the left panel using the same method as the right.
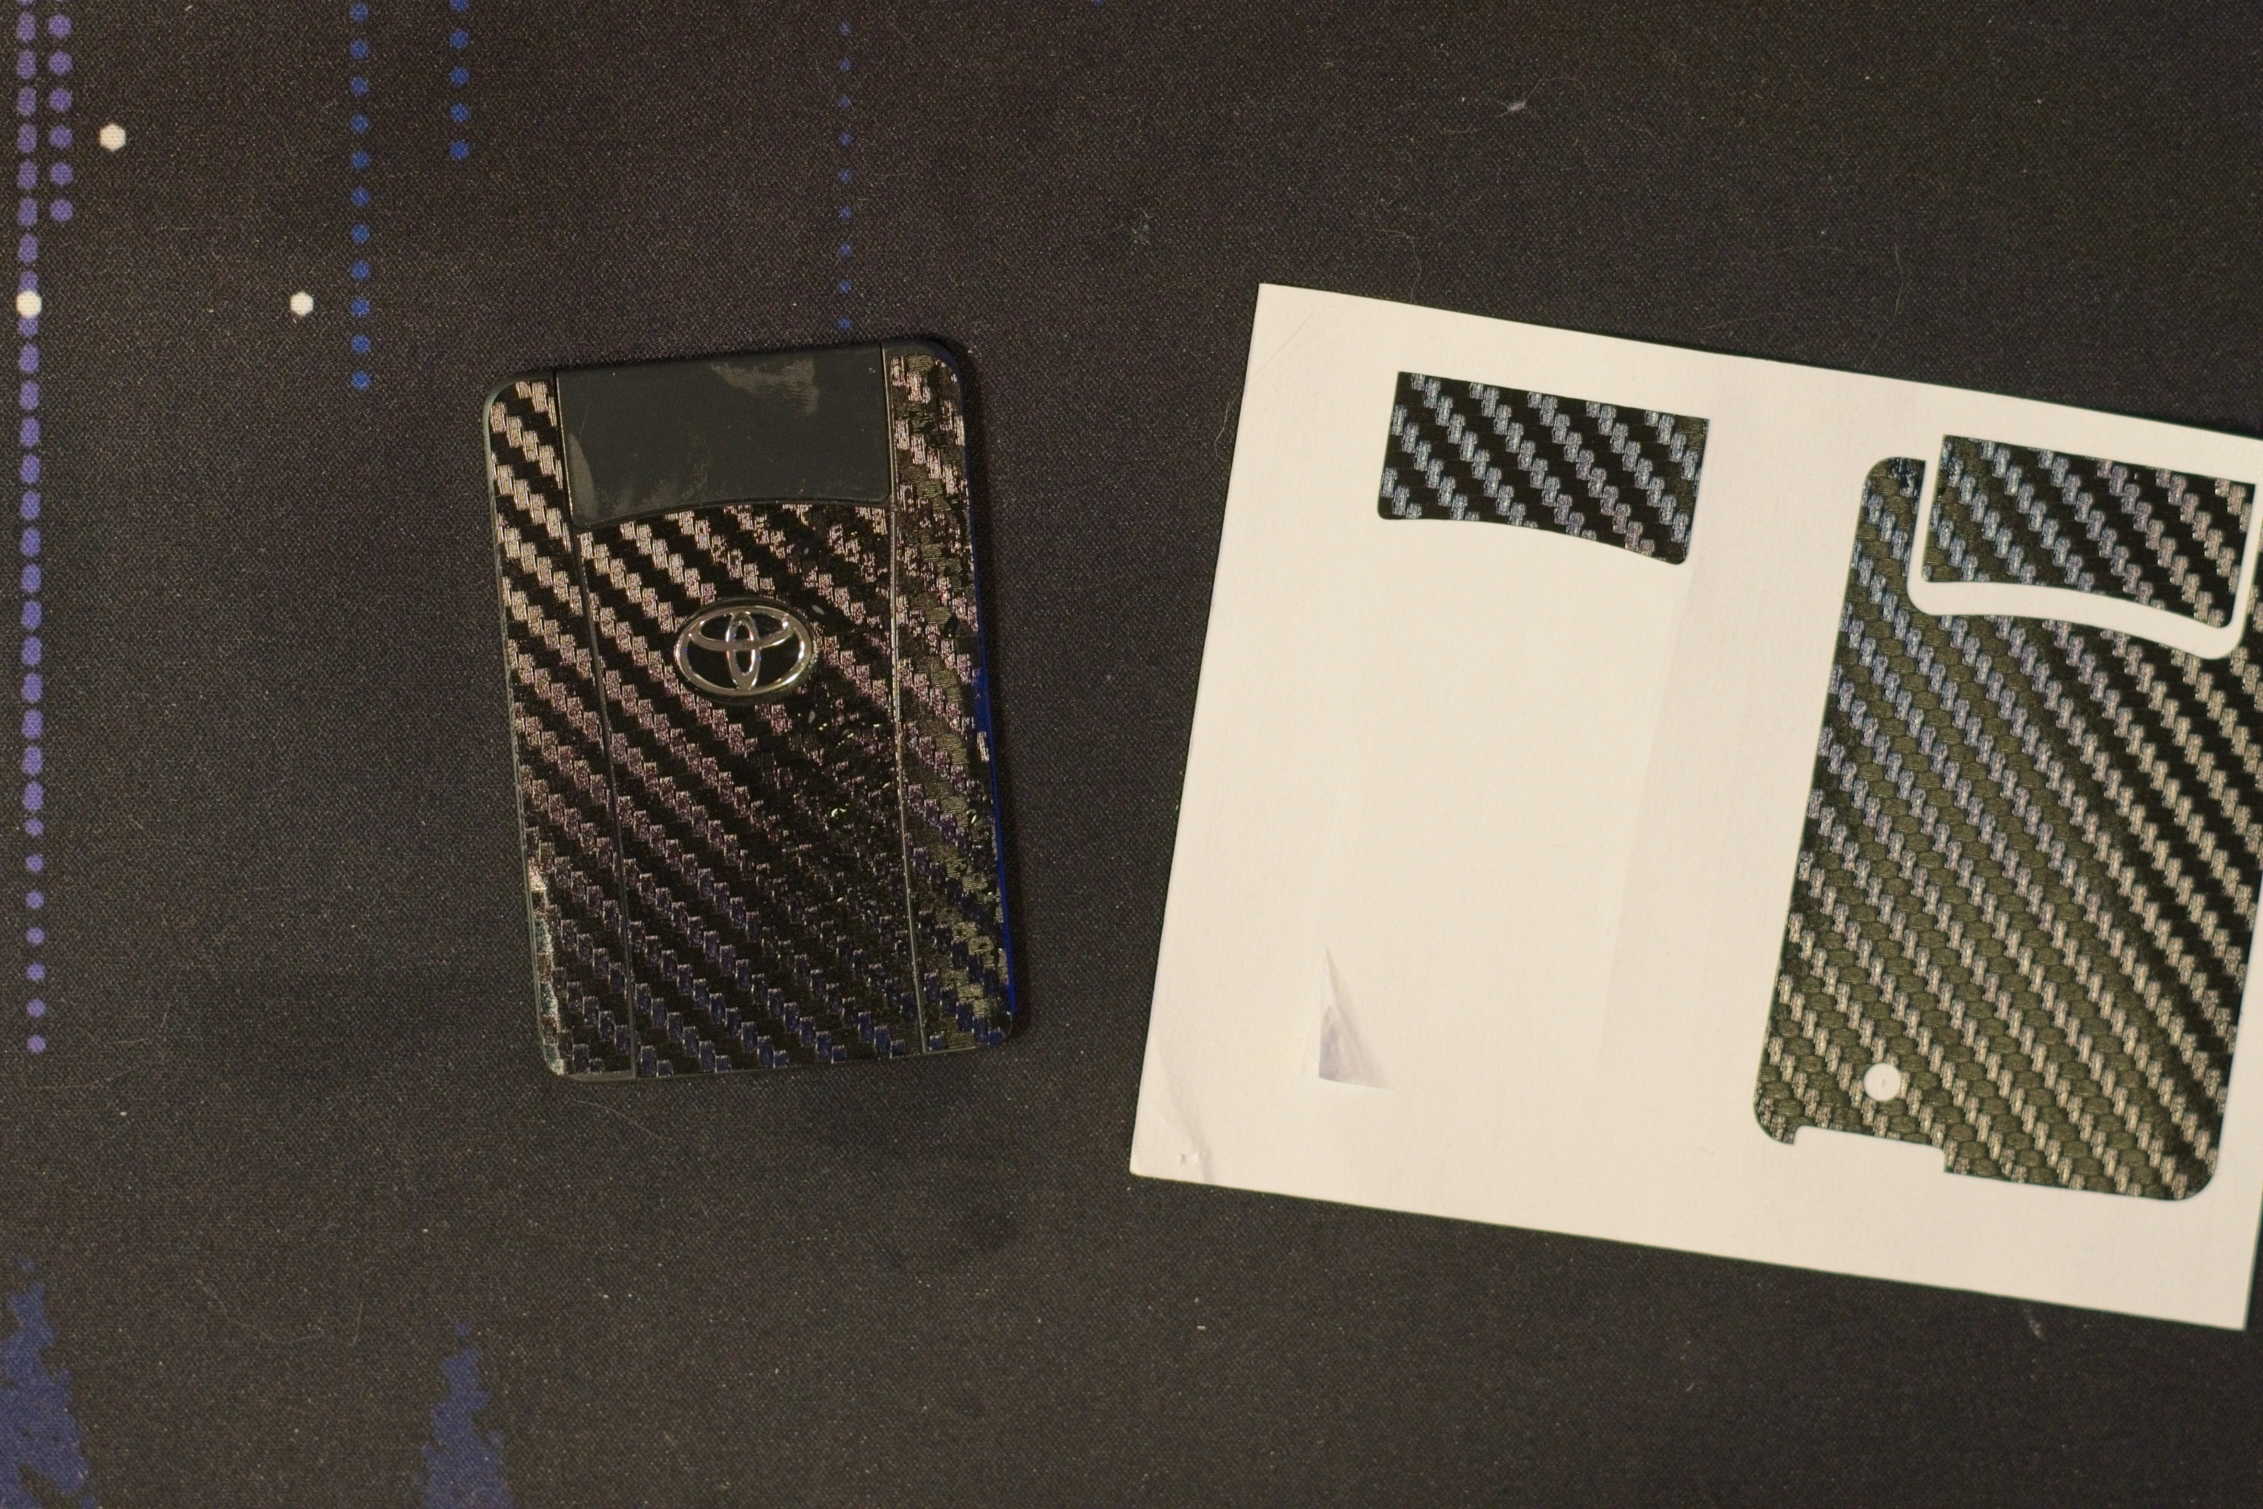
-
Peel the top panel from the backing. Align the bottom edge with the corresponding contour on the key fob, then slowly lay it upward, keeping the left side aligned.
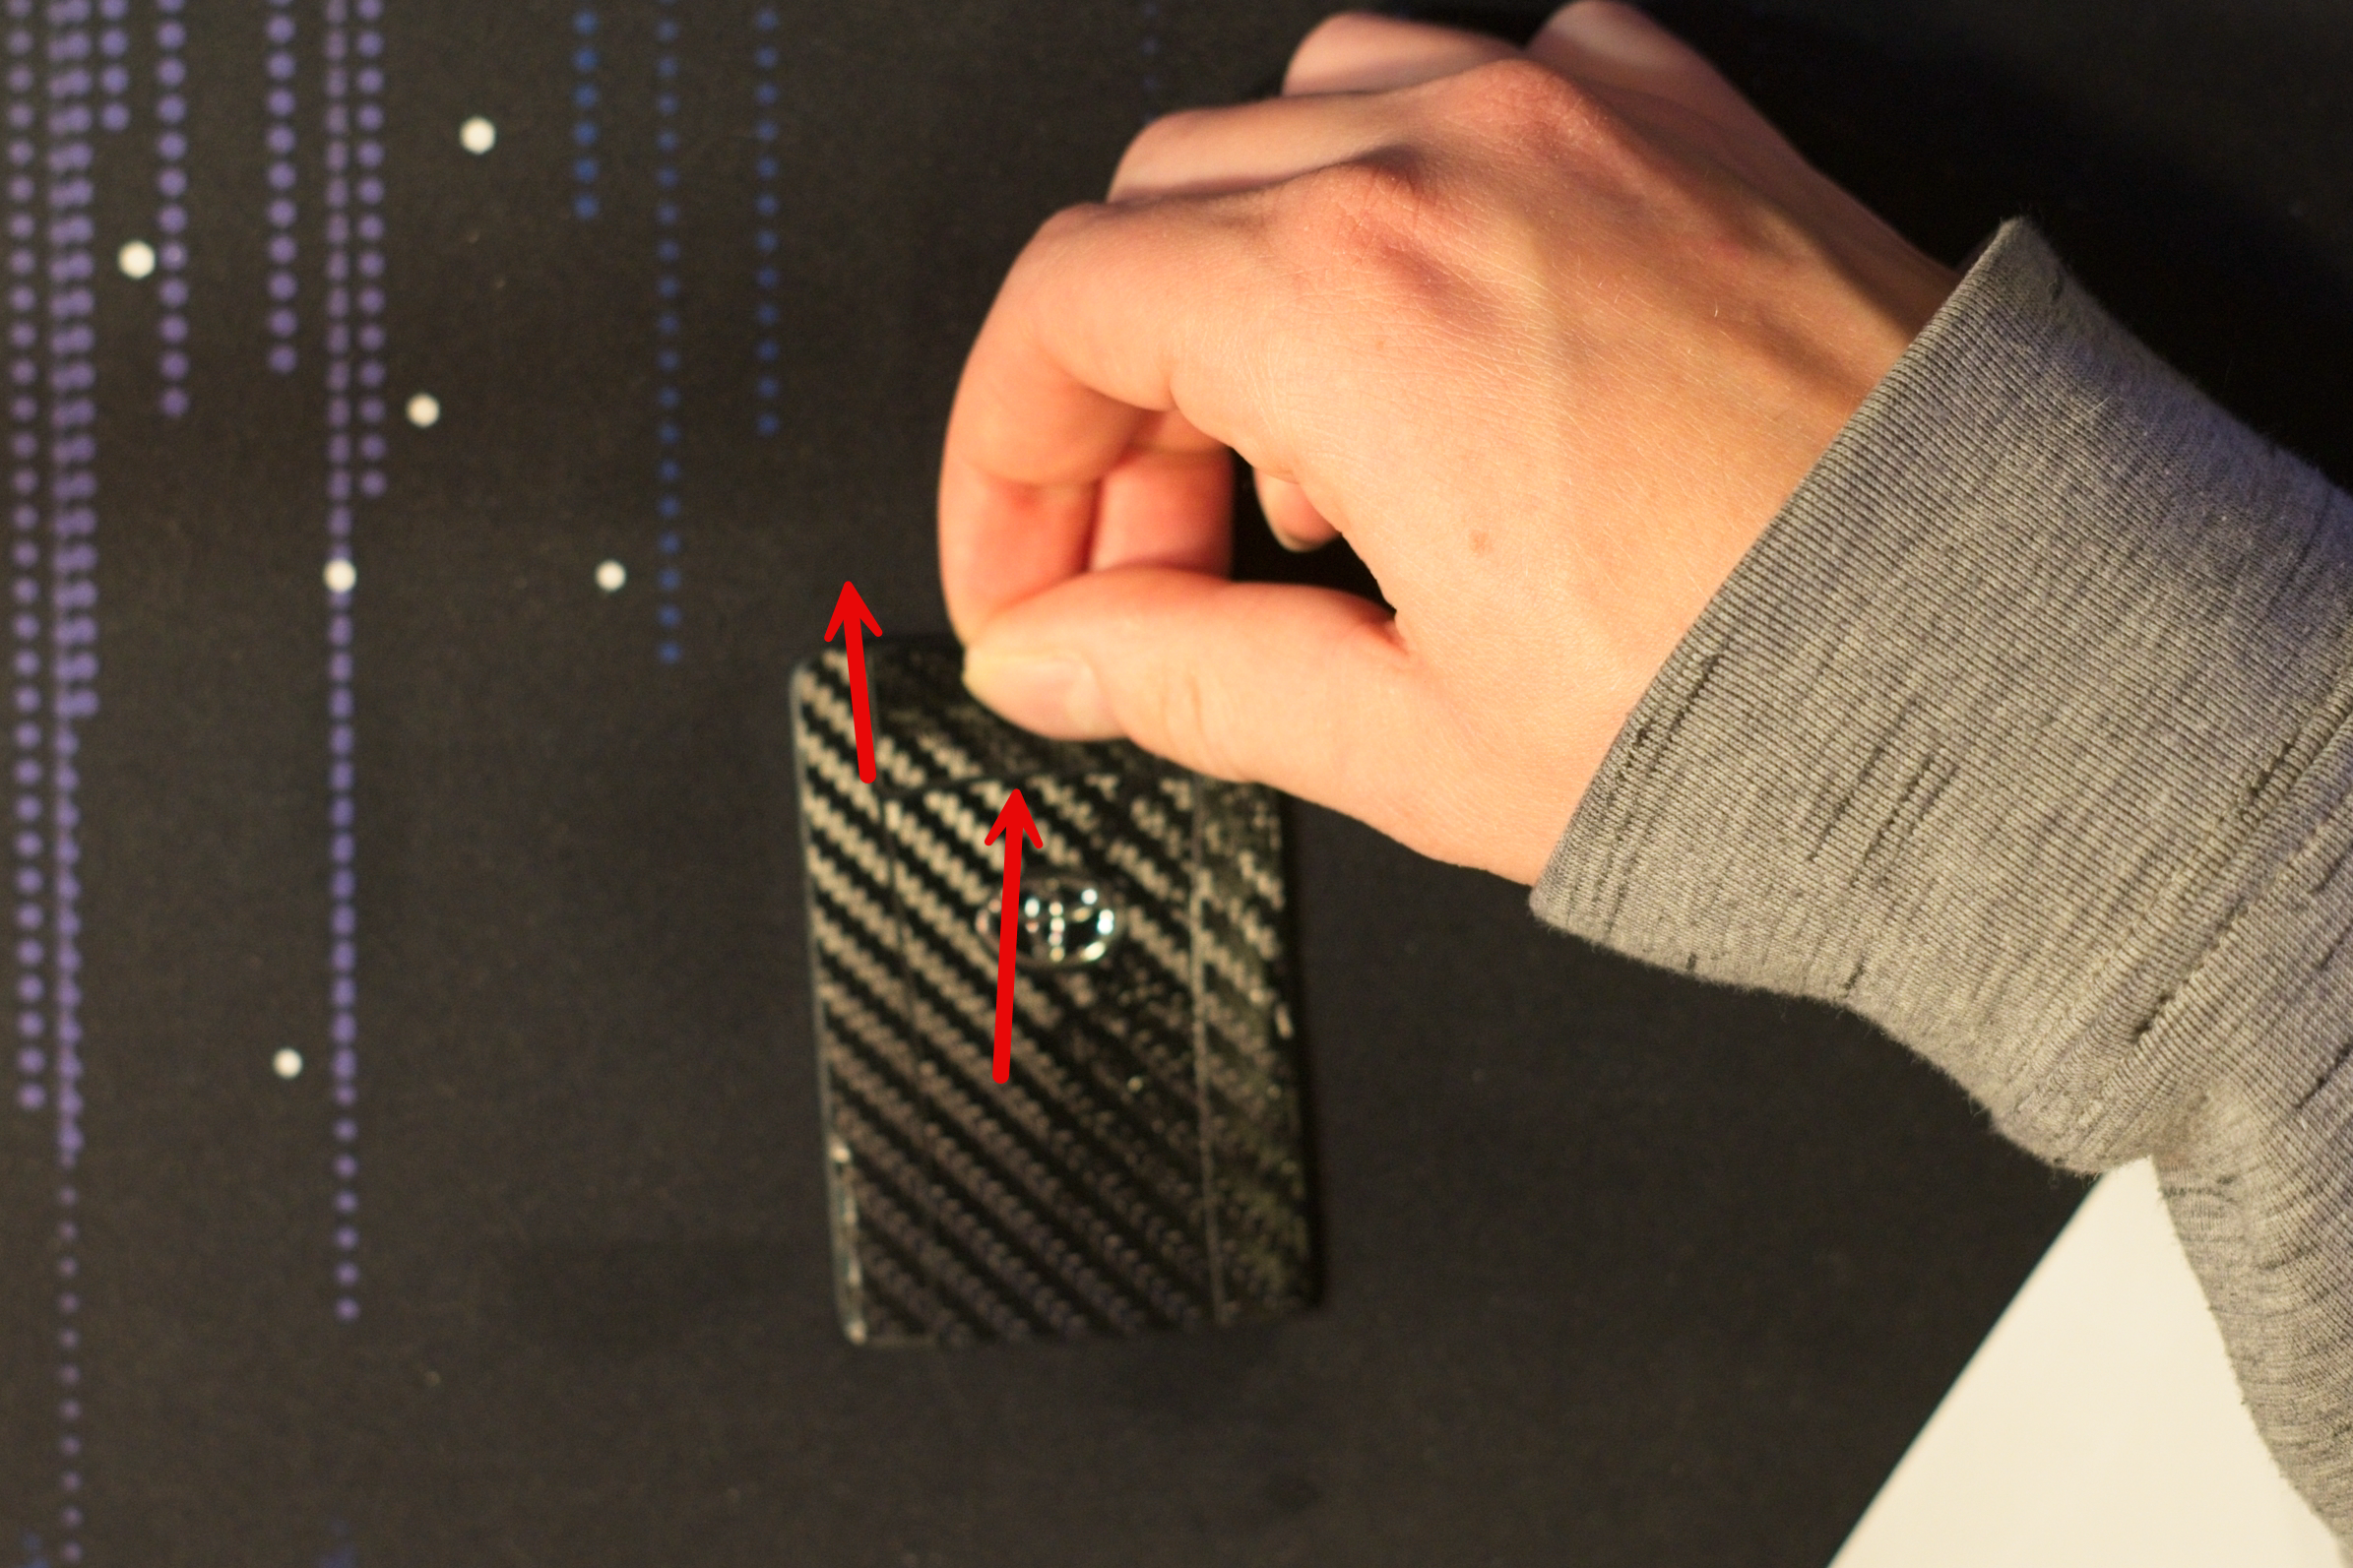
-
The front of the key is complete! If you used water, squeeze out as much moisture as possible before flipping to the back.
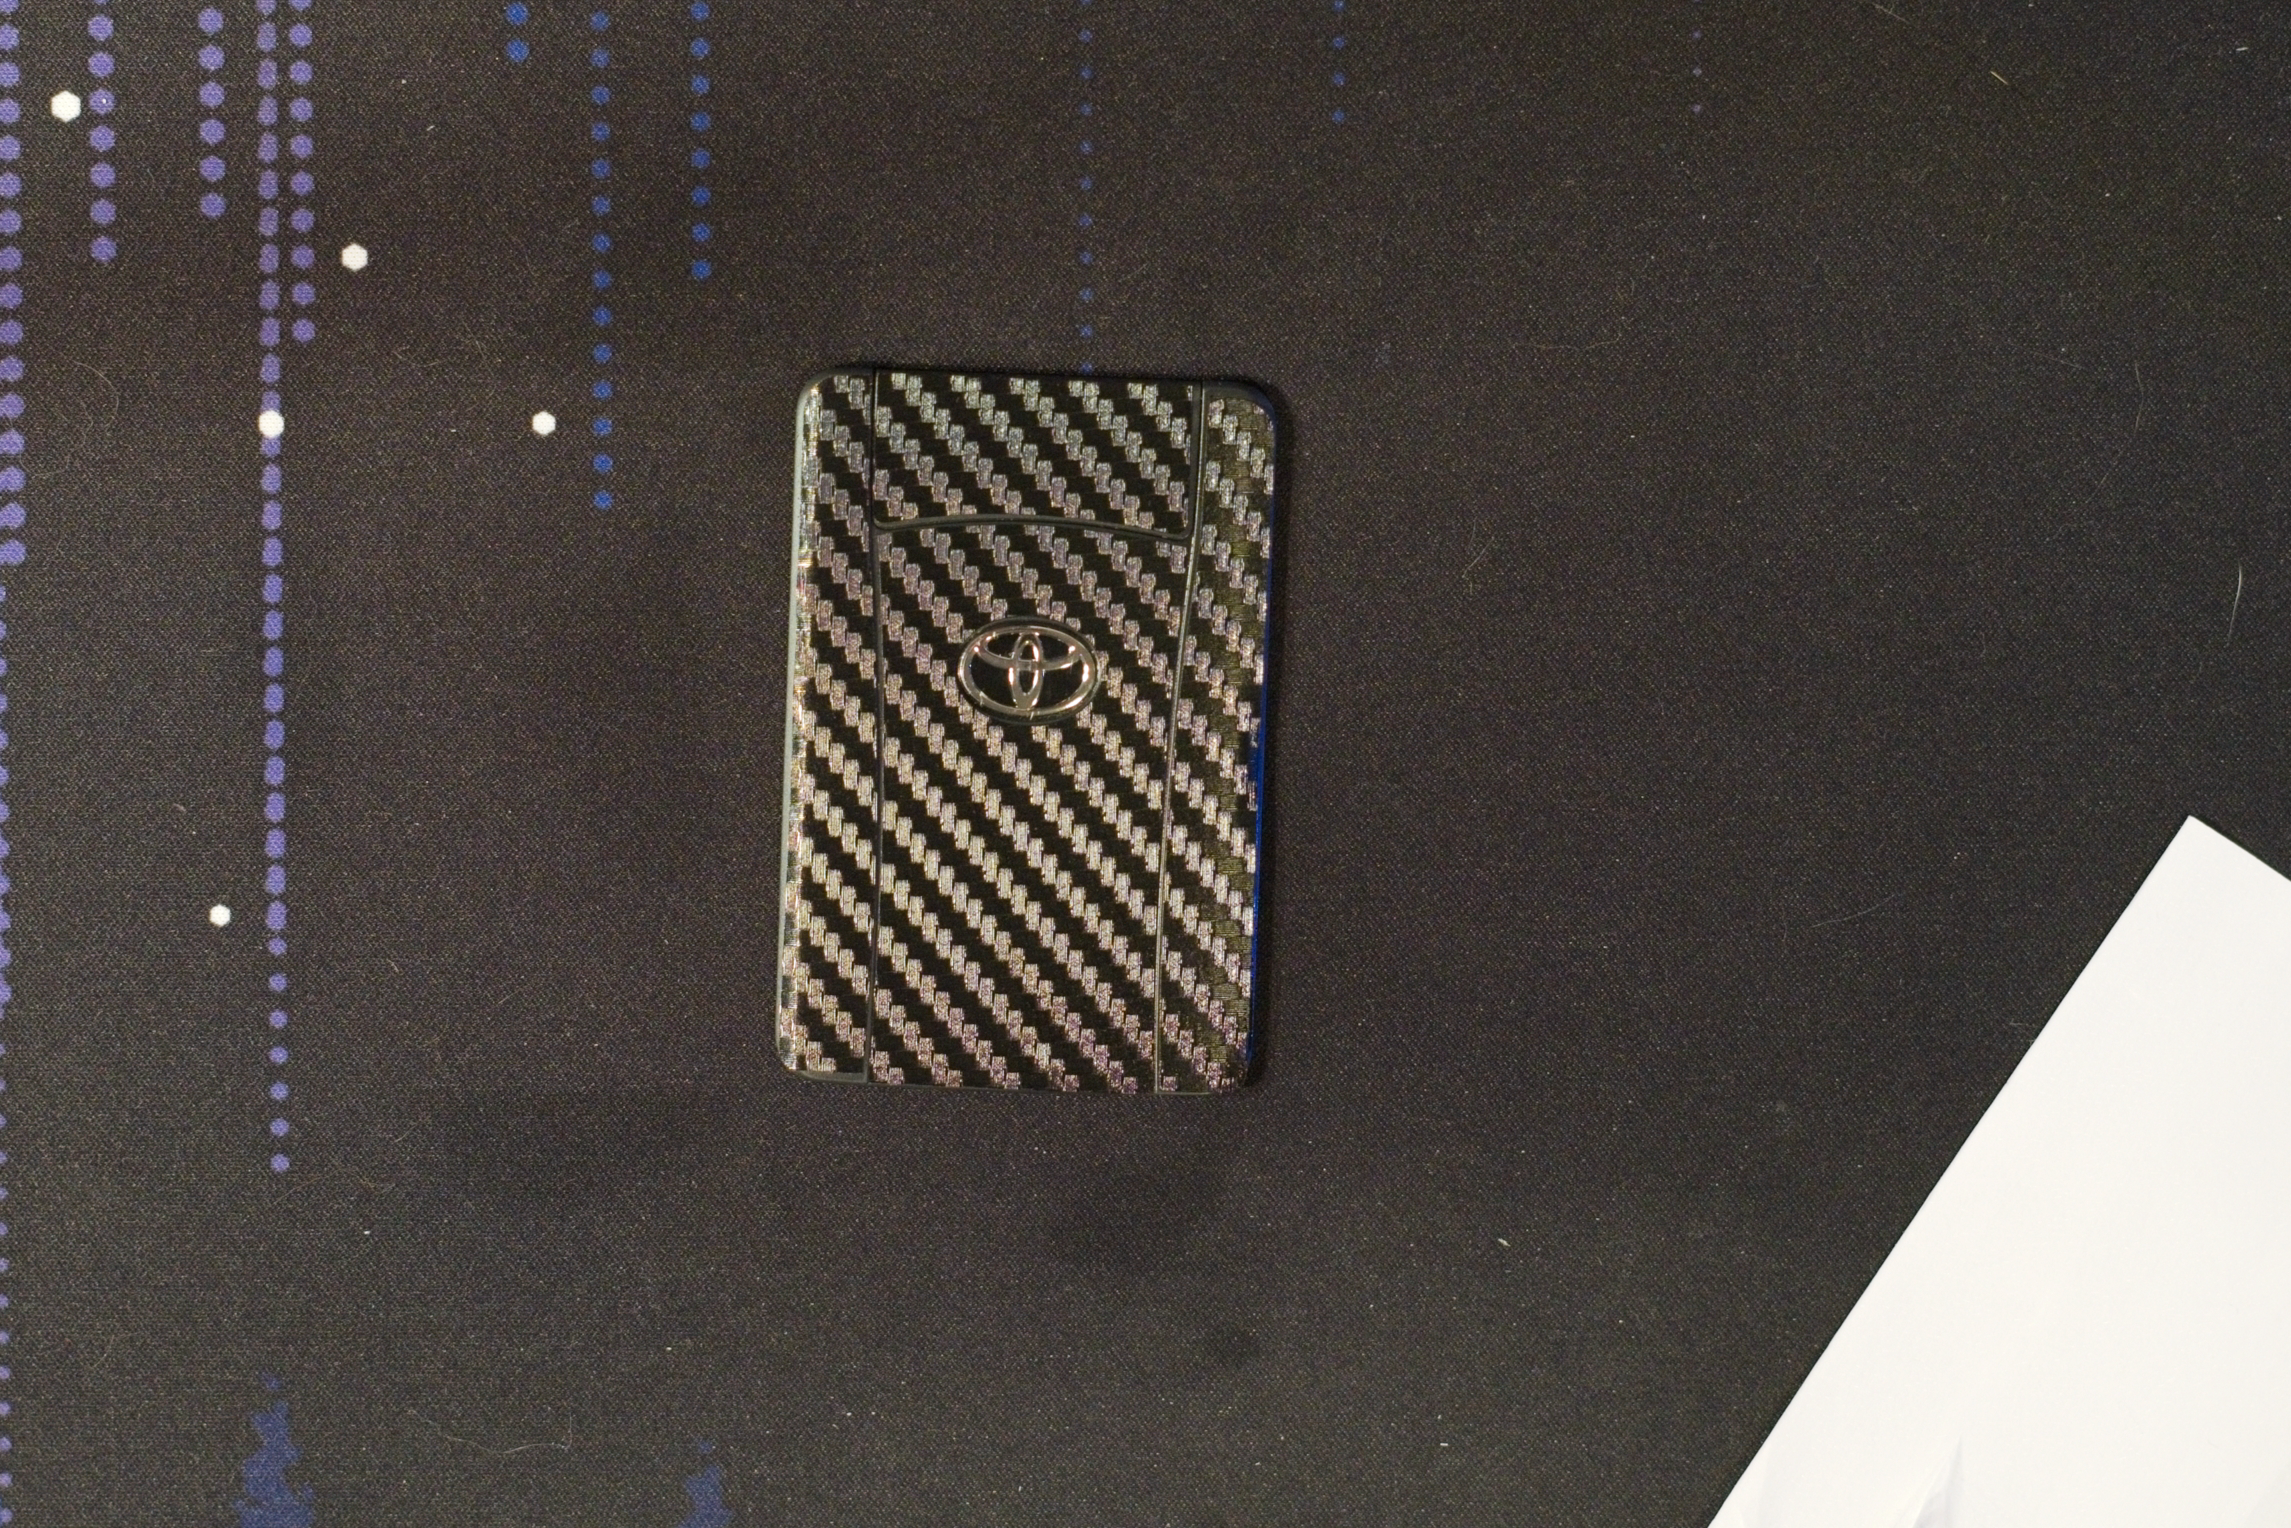
-
Flip the key over. Optionally, give the back a light mist of water.
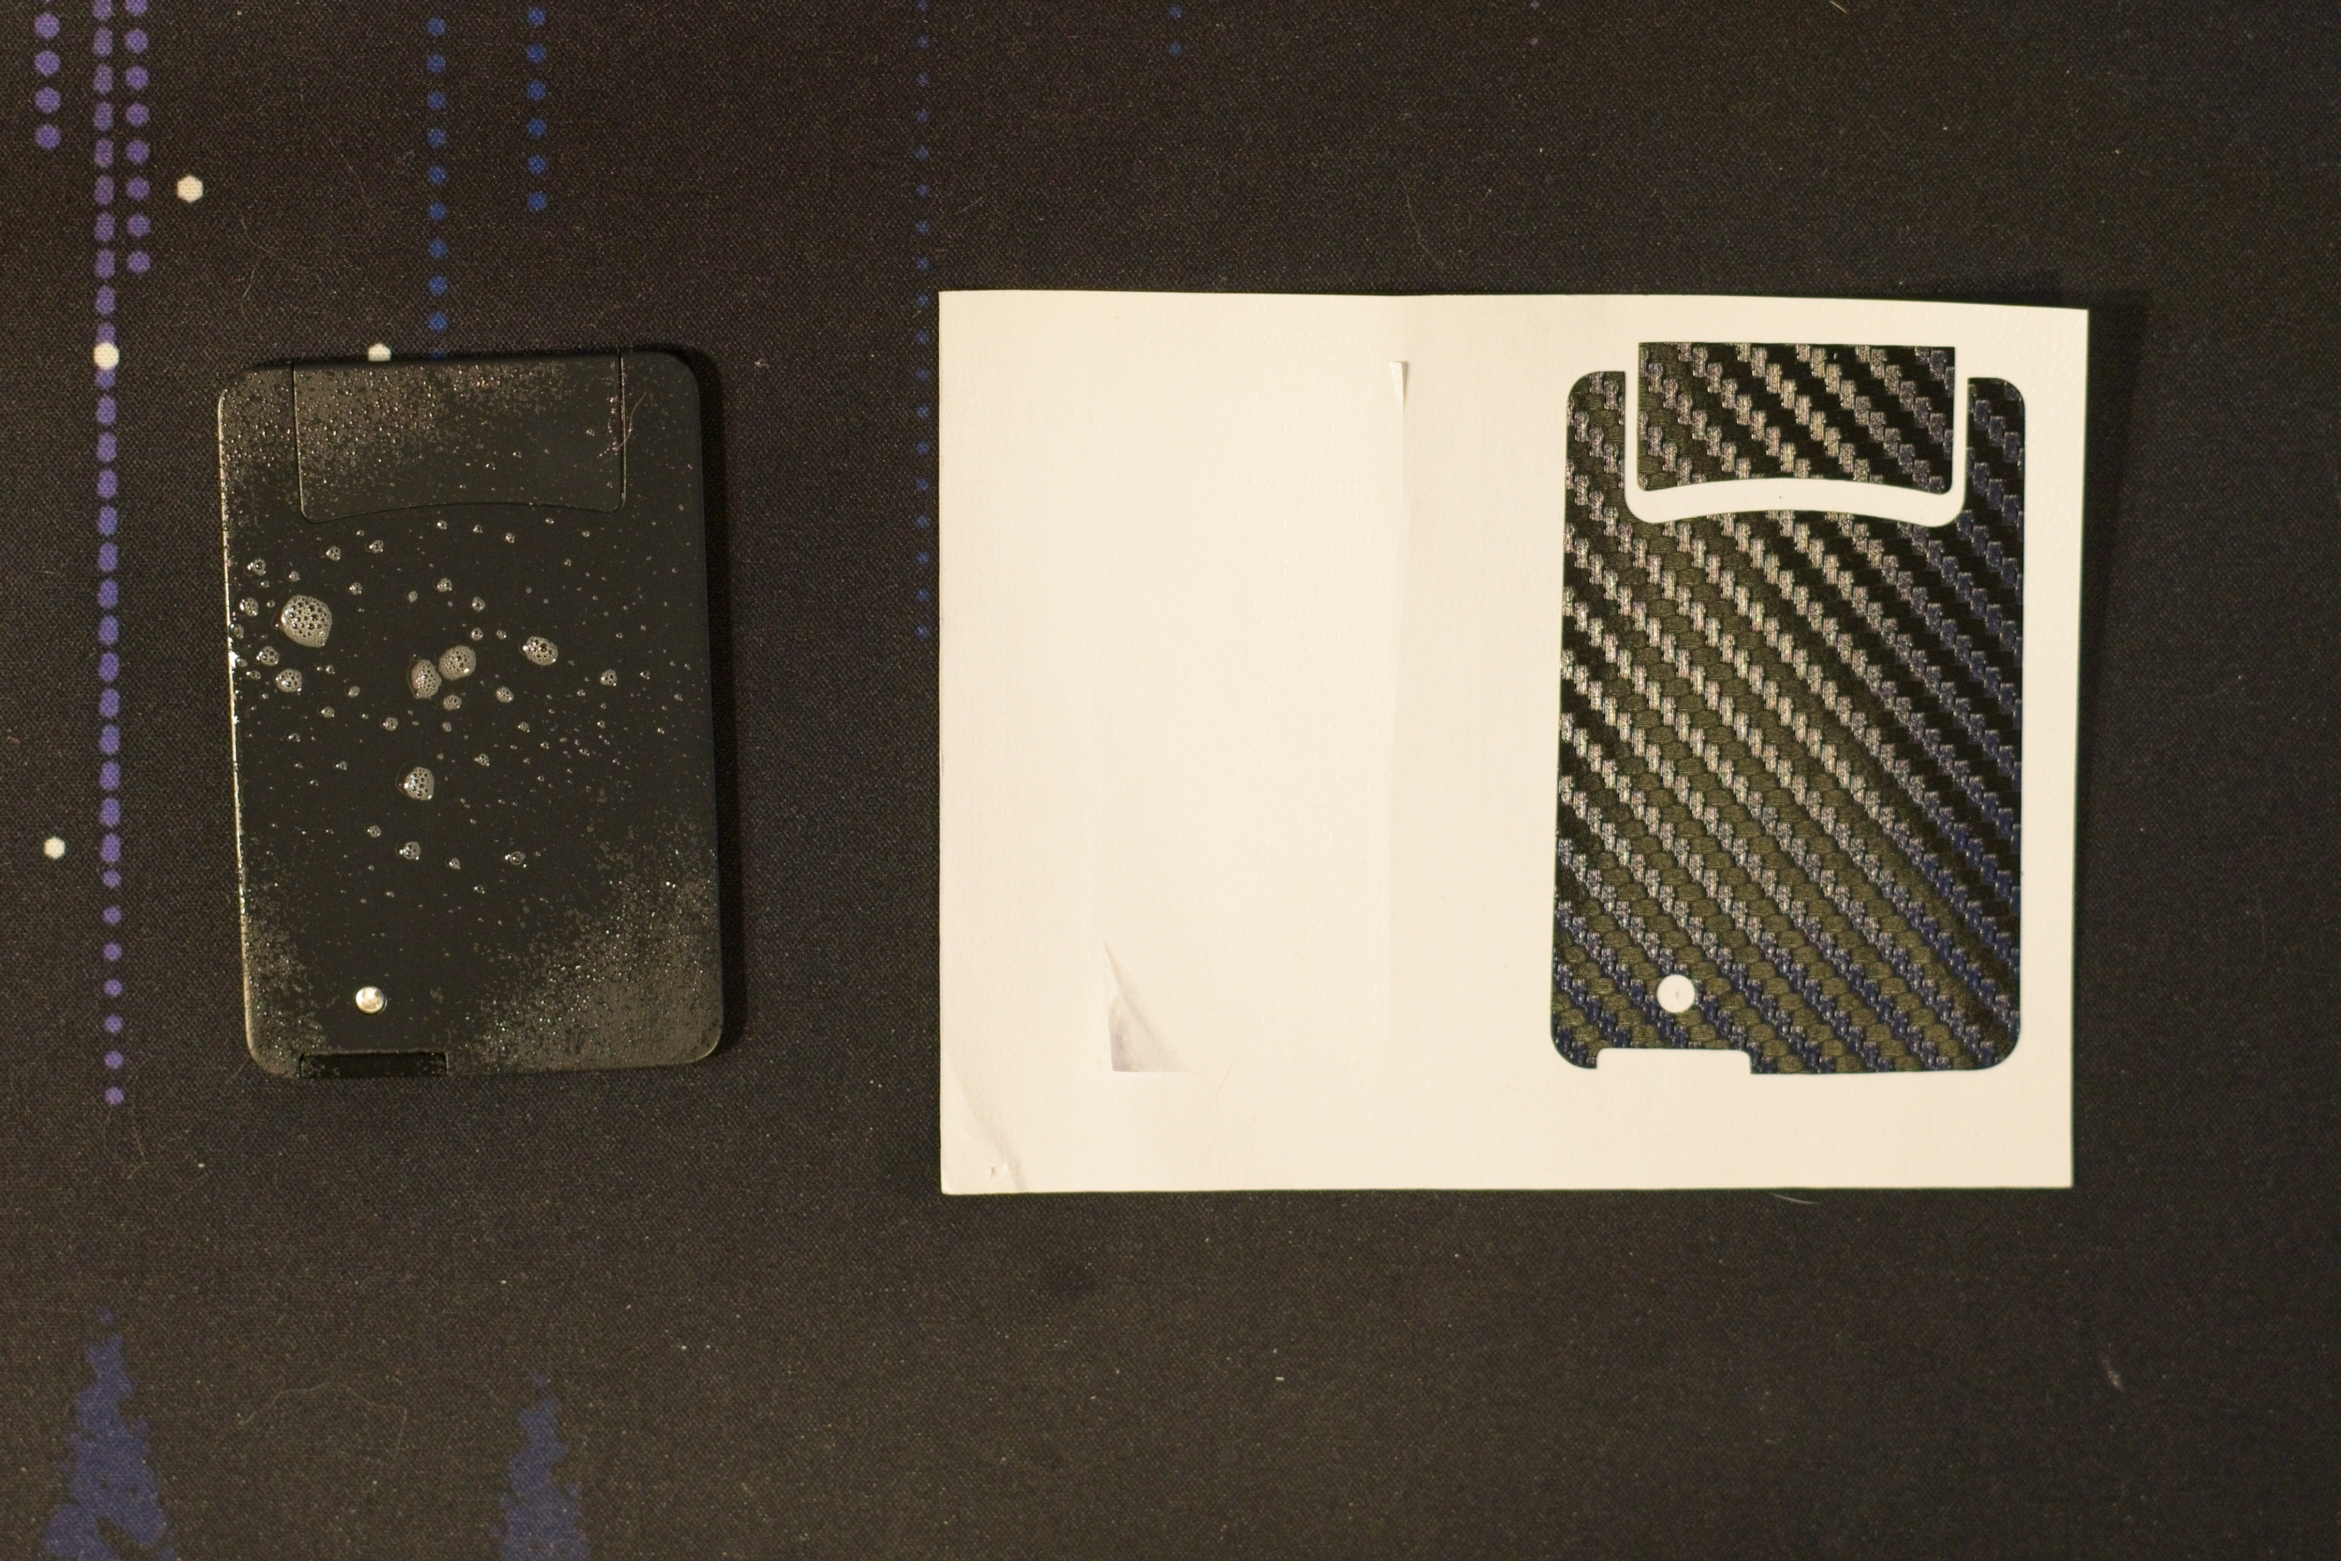
-
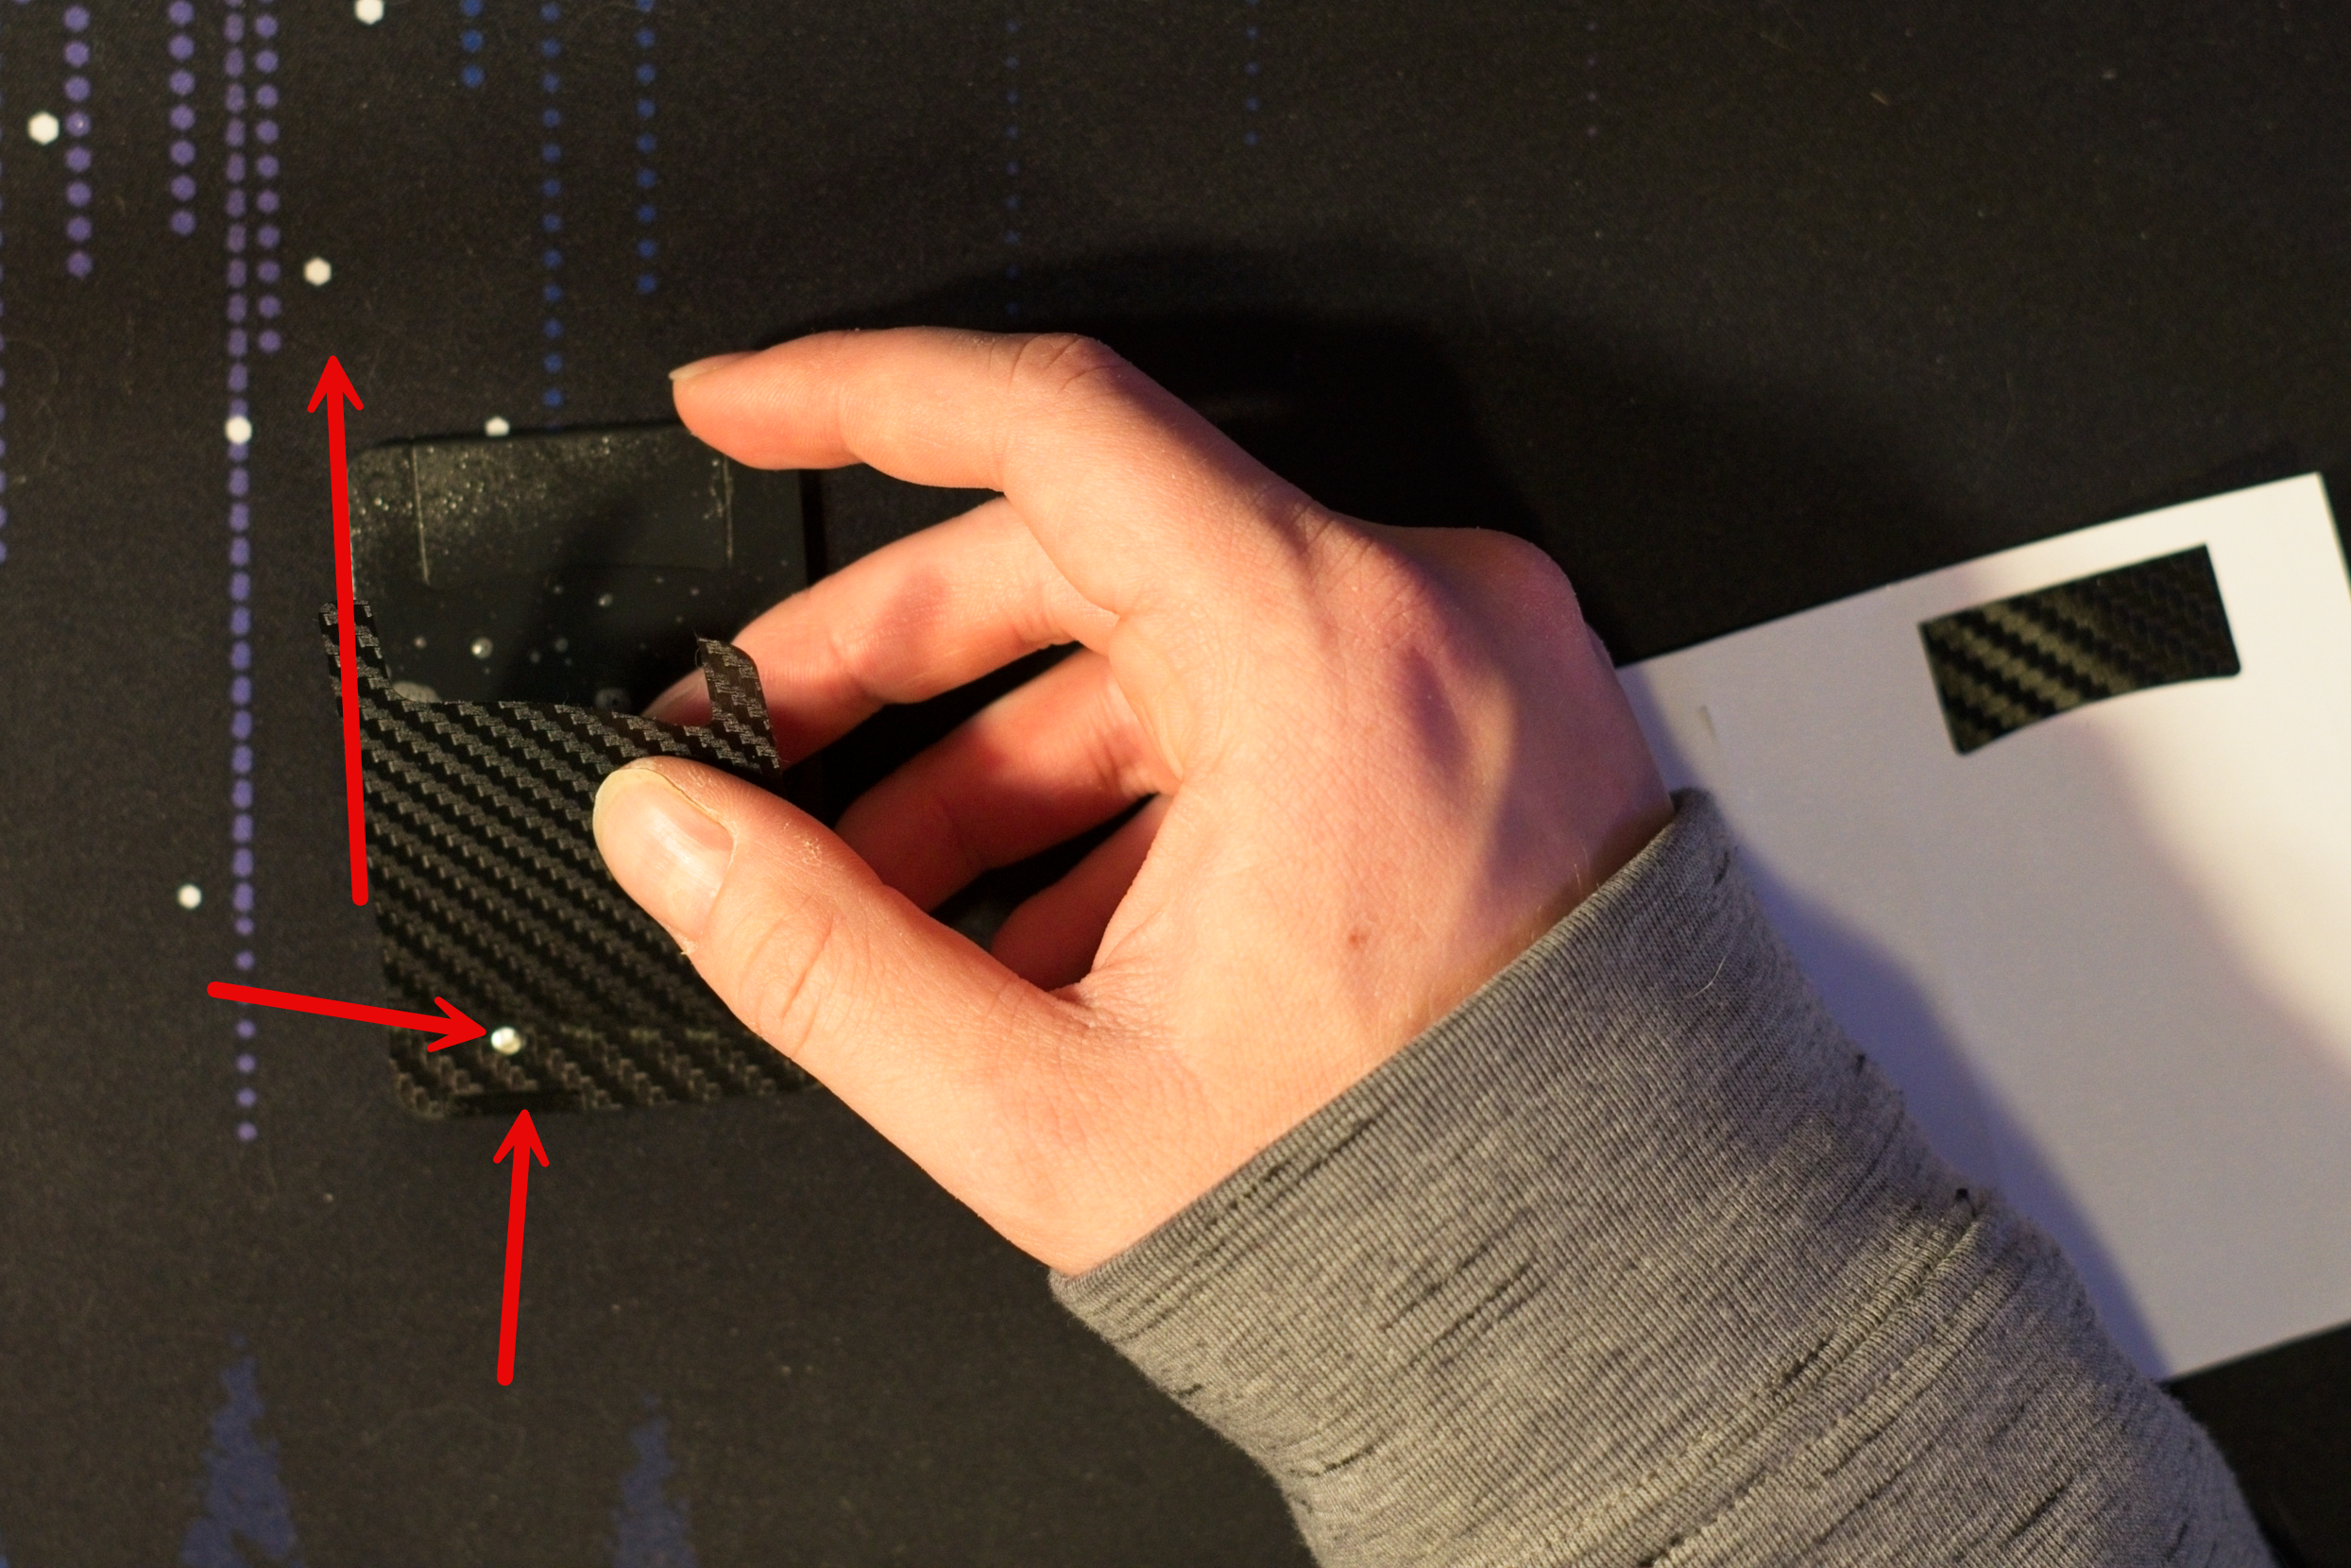
Peel the main back panel from the backing. Align it to the bottom-left corner, positioning it slightly to the left — make sure the cutouts line up with the physical key release button and the key slot. Once the bottom is aligned, slowly lay the skin upward along the left edge.
 tip
tipIf you used water, you can gently shift the panel to fine-tune the fit before pressing it down.
-
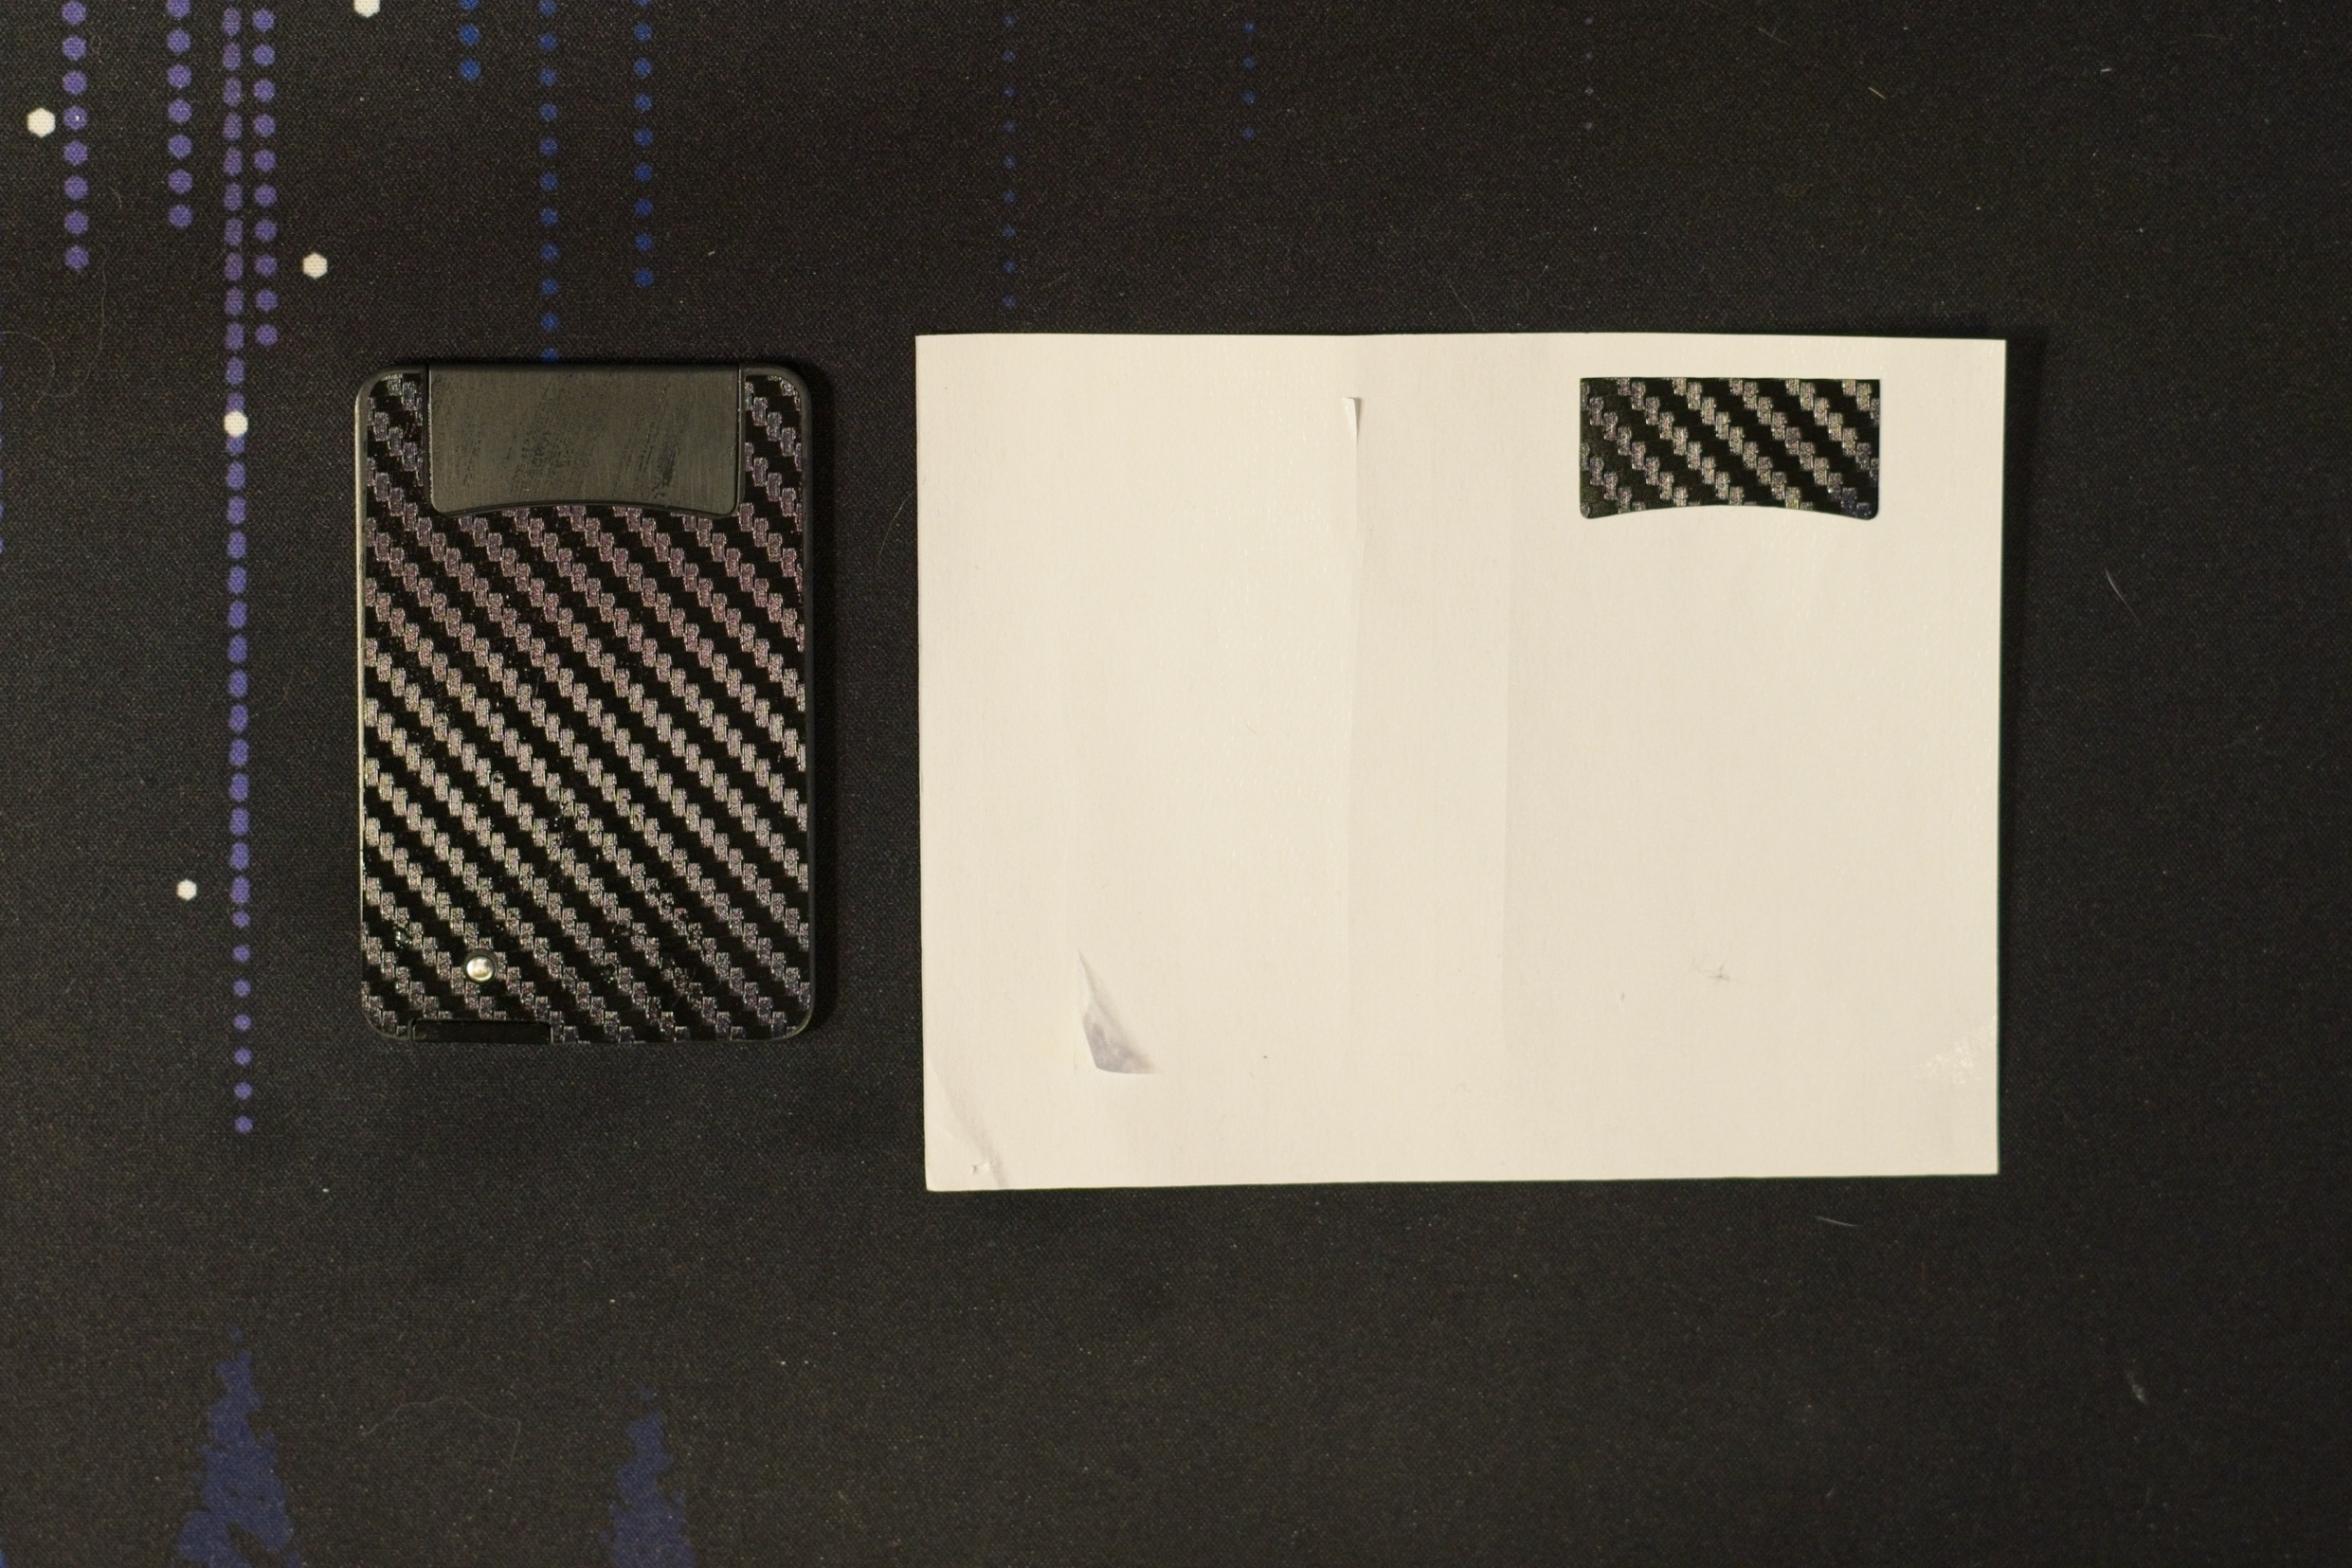
Finally, apply the upper back panel by aligning its bottom edge and laying it upward along the left edge of the key.
-
The back of the key is complete!
If you used water, it can take up to 24 hours for the adhesive to fully cure. Squeeze out as much moisture as possible and handle the key gently during this period.
FAQ
Which Toyota key models are compatible? Confirmed compatible: Toyota/Lexus Smart Access Card (8990H-A1010)
Can I remove and reapply the skin? Removing the skin may stretch it and weaken the adhesive, so reapplication is not recommended. However, each pack includes two skins.
Will this affect my key fob's signal range? No, the vinyl skin is RF transparent and will not affect signal range.
Troubleshooting
There are air bubbles under the skin Gently lift the skin from one corner until you reach the bubble, then lay it back down slowly, squeezing out all air as you go.
Returns
We accept returns within 30 days of delivery. The buyer is responsible for return shipping costs.
If you have any questions or run into issues, reach out to us at [email protected].